The Living Room Wall That Finally Feels Like You: Photo Collage Ideas That Actually Work
You walk into someone’s living room and one wall stops you cold. Not because it’s perfect — because it’s real. A mix of frames, some crooked, a postcard from Lisbon, a photo that makes you ask about the story behind it. That’s the wall we’re building today.
—
1. Why Most Photo Walls Feel Cluttered (And the One Shift That Changes Everything)
There’s a difference between a photo wall and a gallery wall, and most people accidentally make one when they meant to make the other. A photo wall is personal. Chaotic in the good way. It grows over time and tells a story that belongs only to you. A gallery wall, done poorly, is just a bunch of frames that happened to end up in the same place.
The shift is this: intentional anchoring. Before you put a single nail in the plaster, pick one piece — one photo, one print, one oversized frame — that everything else will orbit around. Interior designers have been doing this forever, but it sounds fancier than it is. You’re just choosing your centerpiece first. It might be a large black-and-white family portrait. It might be a 24×30 print of a place that changed your life. It might even be a vintage mirror with a worn gold frame that your grandmother left you.
Once you have that anchor, the rest of the wall starts to make decisions for itself. Smaller frames cluster around it. Odd numbers group naturally to one side. The eye has somewhere to land, and then somewhere to wander.
That one decision — choosing the anchor before anything else — turns a chaotic wall into a conversation.
“The best gallery walls don’t look designed. They look found.”
—
2. The Frame Mix Formula That Interior Designers Use Without Telling Anyone
Walk into any living room that’s been professionally styled and count the frames. Now count the different frame finishes. It’s almost always three. Not two, not four. Three.
Here’s why: two finishes feel like a mistake. Four feels like a showroom. Three creates what designers call visual tension — the good kind, where your eye keeps moving, keeps finding something new. The classic trio right now is black, natural wood, and one metallic (brass is having its extended moment, but pewter is quietly becoming the cooler choice in UK homes especially).
What you do with the sizes matters just as much. The rule is simple enough to actually use: vary your sizes but repeat your shapes. So you might have a cluster of rectangular frames in three different sizes — a large landscape, two medium portraits, one small square — and it reads as cohesive even though nothing matches. Add a round frame or two and the whole thing softens beautifully. Round frames do something rectangular ones can’t: they introduce a breath, a pause, a gentle shape among all that hard geometry.
In terms of mat width, stick to either all-white mats or no mats. Mixing matted and unmatted frames is where most DIY gallery walls quietly fall apart. Choose your camp and commit.
—
3. The Color That Keeps Showing Up in Every Beautiful Living Room Photo Wall Right Now
Sepia? No. Oversaturated bright prints? No. The color story dominating photo walls in 2024 and moving strong into 2025 is something more specific: warm neutrals with one unexpected color pop.
Think of it this way. Your anchor photo is a large black-and-white portrait. Your secondary prints are in warm tones — aged cream, sandy beige, that slightly golden hue that old film photos have. And then somewhere in the cluster, a single art print in deep terracotta or dusty sage or a muted cobalt. Just one. It doesn’t need to be a photograph at all. A simple typographic print, a pressed botanical, a child’s watercolor painting in a coordinating hue.
That one color note is what people remember when they leave the room. It’s what makes someone say, “I love your wall,” without quite knowing why.
For UK homes especially, where walls often lean toward white-grey or period plaster tones, a terracotta note does extraordinary things. It warms the whole wall without you having to paint a thing. For American living rooms working with greige or warm white walls, dusty sage prints add depth without competition.
—
4. How to Lay Out Your Wall Before You Touch a Single Nail
Let me save you several hours and at least one filled-in hole in your wall.
Tear out paper bag sheets, brown wrapping paper, or newspaper pages and trace each frame on them. Cut them out. Tape them to your wall with painter’s tape. Stand back. Live with it for a day.
This sounds unbearably simple, but the number of people who skip this step and then spend a Saturday evening with a flashlight and spackling compound is genuinely alarming. The paper template method gives you the actual scale of the arrangement on your real wall, in your real light. It costs nothing. It changes everything.
There are also several free apps now — Canva, IKEA’s planning tools, even dedicated gallery wall planners — that let you photograph your wall and overlay frame arrangements digitally. These are brilliant for people who want to play with different configurations without touching paper or tape. But there is something uniquely satisfying about the physical templates. Something about standing in your actual room, in your actual afternoon light, seeing exactly where things will land.
“Measure once, cry once. Template first, hang once.”
When you’re happy with the paper layout, use a level before you touch anything. A slightly tilted frame in isolation reads as charming. An entire wall of tilted frames reads as structural damage.
—
5. The Gallery Wall That Works in a Victorian Terrace or a New-Build Flat
British homes present a specific challenge that American Pinterest tutorials don’t always account for: the walls are often harder, plaster is older and less forgiving, and the proportions of rooms — particularly in Victorian terraces or purpose-built flats — don’t work with the vast American gallery-wall scale you see on Instagram.
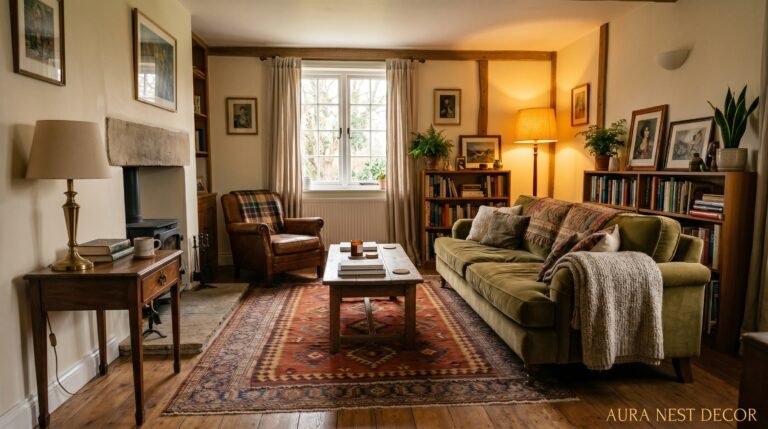
The solution is density over sprawl. Rather than spreading your frames across a full wall, create a concentrated cluster that feels intentional. In a smaller British sitting room, a tight grouping of 8–12 frames on one chimney breast wall hits harder than a loose arrangement across 12 feet of wall space. It reads as collected rather than decorating.
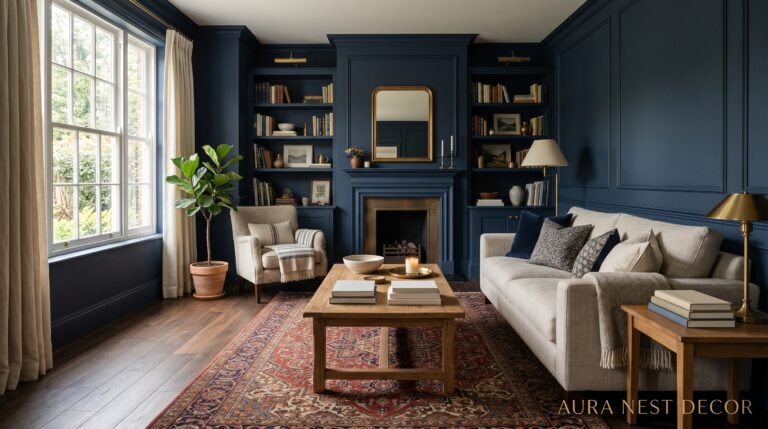
For Victorian homes especially, lean into the period details. Dark-stained wood frames play beautifully against original coving and high ceilings. Cream or ivory mats echo the bone-white of period woodwork. And if you have a fireplace below the wall you’re working with, the natural focal point of the hearth anchors the whole thing without any additional effort from you.
New-build flats are the opposite challenge: too much plain wall, no architectural features to lean on. Here, the gallery wall IS the architectural feature. Go bigger than you think you should. Spread wider. That expanse of smooth plasterboard wants something substantial.
—
6. What to Actually Put on the Wall (Beyond Just Photos)
This is where your wall gets its personality.
Photographs are the heart, but they shouldn’t be everything. A photo wall that’s only photographs — even beautiful ones — can read as a memorial rather than a living display. What breaks it up and makes it interesting is the mix.
Pressed botanicals in simple frames. A page torn from an old illustrated book, matted in cream. A child’s drawing, blown up to 8×10 and treated as real art (because it is). A postcard pinned flat to the wall without a frame at all. A small mirror that catches the afternoon light. A typographic print in your favorite handwriting-style font with a line from a poem or a lyric that means something specific to you.
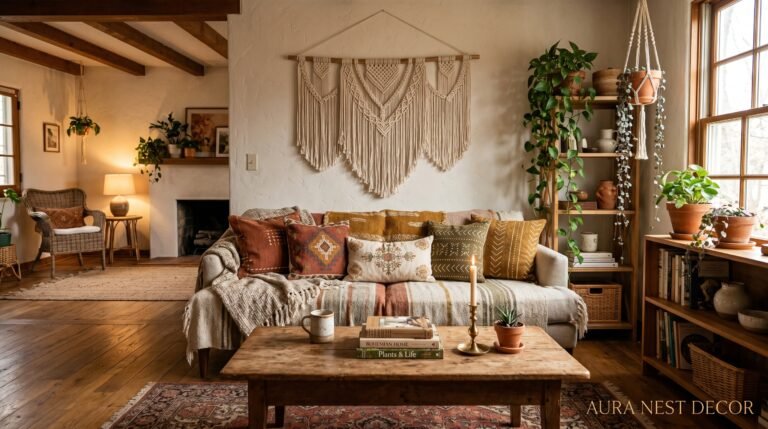
The textile element is underused. A small piece of macramé, a linen-backed embroidery hoop, a woven wall hanging no bigger than a dinner plate — these add texture that flat frames simply cannot. In a wall that’s all glass and paper, one tactile piece creates a moment of surprise.
What you’re really building is a visual autobiography. When a stranger looks at this wall, they should be able to learn something true about you within thirty seconds.
—
7. The Lighting Move That Makes Photo Walls Look Expensive
Most photo walls are lit from above — overhead ceiling lights that create harsh downward shadows inside each frame. The photo looks darker than it is. The wall looks flat. The whole thing loses about forty percent of its impact.
The fix costs less than you’d think.
Picture lights — the small bar lights that mount directly above a frame — used to feel stuffy and traditional. In the last few years they’ve been redesigned into clean, minimal forms that read as contemporary. A brushed brass or matte black picture light above your anchor piece alone is enough. You don’t need to light every frame. Light the hero and let the rest live in its glow.
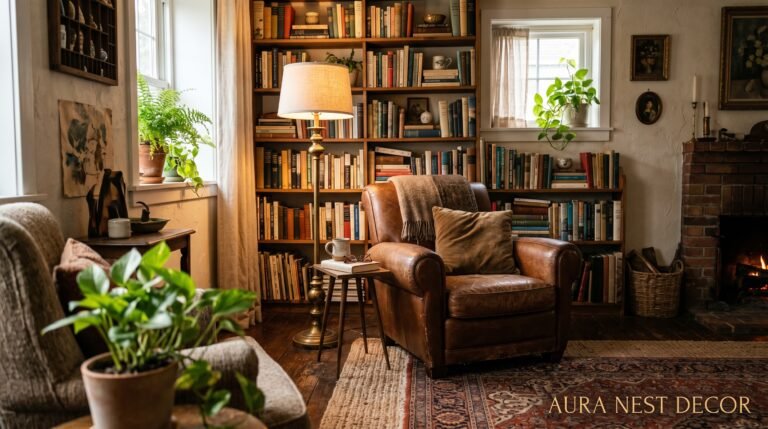
For a softer approach, a plug-in sconce on either side of your gallery wall, positioned at eye level, creates the kind of amber warmth that makes a room feel expensive at 7pm on a winter evening. It’s not task lighting. It’s atmosphere.
String lights threaded through a gallery wall tend to look better in photographs than in real life, but a few small Edison bulbs — actual low-wattage ones with visible filaments, not imitation LEDs — clipped or tucked near the wall’s edge do the same warm work without the fairy-light vibe.
“The right light doesn’t just illuminate a wall. It makes every photo look like it was always meant to be there.”
—
8. The Arrangement Style That Feels Intentionally Undone
Symmetrical grids are safe. And safe isn’t always wrong — a perfect grid of identical black frames in matching sizes reads as clean, confident, and modern. It works particularly well in contemporary apartments or anyone with a more minimal sensibility.
But the arrangements that stop people mid-scroll on Pinterest are almost always asymmetrical. The salon-style hang — frames at different heights, different sizes, arranged as if they grew there organically — is harder to pull off but vastly more personal. The key difference between a salon wall that works and one that doesn’t is this: keep the outer edges roughly even. Imagine an invisible rectangle or oval that all your frames sit within. Inside that boundary, be as chaotic as you like. Let pieces overlap in scale, vary heights dramatically, cluster small frames near large ones. But at the perimeter, maintain a rough edge so the whole arrangement reads as a thing rather than as chaos.
In practical terms: don’t let one small frame hang lonely at the far edge of the arrangement. And don’t let your anchor piece sit off-center with nothing to balance it on the other side. The eye needs somewhere to enter and somewhere to rest.
—
9. Vintage and Thrifted Frames: The Strategy That Actually Works
Charity shops in the UK and thrift stores in the US are gold mines for gallery walls. But there’s a reason most thrifted frame projects end up looking muddled: people buy frames they love in isolation rather than thinking about how they’ll look together.
The move is to thrift for shape and size, then unify with paint.
Find six frames in interesting shapes — ornate gold, chunky dark wood, thin chrome, whatever — and paint them all the same color. Matte black is the classic. Warm cream for a softer look. Even a deep forest green if you’re confident and your room can hold it. Suddenly, six mismatched frames from three different charity shops look like a curated set.
What you keep from each frame is the shape — the interesting carved detail, the chunky weight, the unusual proportion. What you lose is the visual noise of mismatched finishes. The result is a wall that feels collected and intentional rather than assembled from leftovers.
Thrift stores near universities are especially good in September when students are moving and leaving things behind. UK charity shops that support house clearances often have unusual older frames that you simply can’t find in Dunelm or IKEA.
—
10. How Children’s Art Fits Into a Grown-Up Gallery Wall
It doesn’t get its own junior wall in the playroom. Not if you want your home to actually feel like yours.
The most beautiful family photo walls I’ve seen treat children’s artwork exactly like any other piece: matted, framed, hung without apology alongside adult photographs and fine art prints. A five-year-old’s painting of a dog, blown up on a color photocopier, matted in white, hung in a black frame — it becomes art. It is art.
The practical version: take photos of artwork before it gets lost or recycled. Upload to a printing service. Print at whatever size fits your frame selection. Treat it exactly as you’d treat any photograph. The child in question will notice that their work lives on the wall alongside everything else that matters, and that moment of recognition is worth more than any dedicated kids’ display board.
Scale is everything here. Blow a small crayon drawing up to A3 or 11×14 and watch what happens. It looks intentional. It looks considered. It looks like you knew what you were doing.
—
11. The One Rule That Makes Any Odd Wall Shape Feel Intentional
Awkward walls — the narrow one beside a doorframe, the sliver between two windows, the wall above a staircase that nobody quite knows what to do with — are actually the best places for photo collages. Here’s why: the constraint does the design work for you.
A single column of frames down a narrow wall between two doorways is striking precisely because it couldn’t be anything else. It had to be vertical. It had to be narrow. The limitation created the design. Lean into it.
Above a staircase, a rising diagonal arrangement that follows the angle of the stairs is one of those things that photographs beautifully and feels dynamic in real life. The frames grow with you as you climb. The eye travels upward.
In a long, narrow hallway — common in Victorian terraces and Edwardian semis — a horizontal band of small frames at eye level running the full length of the corridor turns what is usually wasted wall space into the best part of the house.
The rule is: treat the wall’s limitations as its design brief, not as its problem.
—
12. Where to Print Your Photos Right Now (Because the Quality Gap Is Real)
You can print photos at home. You can use a drugstore or supermarket kiosk. You can order online through any number of services. The quality difference between these options is enormous and rarely discussed.
For anything going on a wall — especially in a frame with a mat where the photo is the feature — you want proper photographic paper, not inkjet or laser printing. The depth, the color accuracy, the feel of a proper c-print or fine art print is immediately visible on a wall even to non-photographers.
In the UK, Photobox, Snapfish, and independent print labs like DSCL London consistently produce beautiful results. In the US, Artifact Uprising, Nations Photo Lab, and Bay Photo are worth the slightly higher cost for any print that’s going somewhere permanent. For large format prints — anything over 16×20 — go to a specialist print lab rather than a chain service.
Black-and-white photos deserve special mention: the difference between a proper black-and-white print on silver gelatin paper and a standard inkjet black-and-white is like the difference between live music and a phone speaker. If your wall is leaning black-and-white, invest in the printing.
—
❓ FAQ
Q: How many frames should a living room gallery wall have? A: There’s no magic number, but most walls that feel balanced land between 9 and 20 pieces. Under nine can feel sparse unless each piece is large and confident. Over twenty starts to feel exhausting unless you have a very large wall and very strong design instincts. For a first attempt, 12–15 pieces gives you enough variety to create a real arrangement without overwhelming the space.
Q: What’s the best way to hang frames without damaging plaster walls? A: For UK plaster walls especially, picture-hanging strips (Command strips rated for the frame weight) are reliable for lighter frames. For anything heavier than about 2kg, use proper picture hooks with the small pin at an angle — these cause far less plaster damage than screws or nails. Always locate a stud for anything over 3–4kg. Avoid over-reliance on adhesive strips on very old lime plaster; it can pull the surface off when you remove them.
Q: Should all photos on a gallery wall match in style — all color or all black-and-white? A: Not necessarily, but they should share something — either a consistent color palette, a consistent mood, or a consistent printing style. A fully mixed wall of color snaps, black-and-white portraits, and sepia-toned vintage photos can feel chaotic. Pick one dominant treatment and let one or two others play a supporting role. Black-and-white as the dominant with a few carefully chosen color pieces as accents is currently the most beautiful version of this approach.
—
💭 Final Thoughts
The best thing about a photo collage wall is that it’s never finished. You add to it. You swap things out. You move the postcard to a new spot and suddenly the whole arrangement shifts. It lives and breathes with you in a way a painted wall or a single large print simply can’t. And when you get it right — really right — you’ll walk into your own living room and feel something quiet and true.
What’s the one photo you’ve been meaning to print and frame for two years now?