The Wall Above Your Couch Is the Most Personal Canvas in Your Home — Here’s How to Actually Fill It
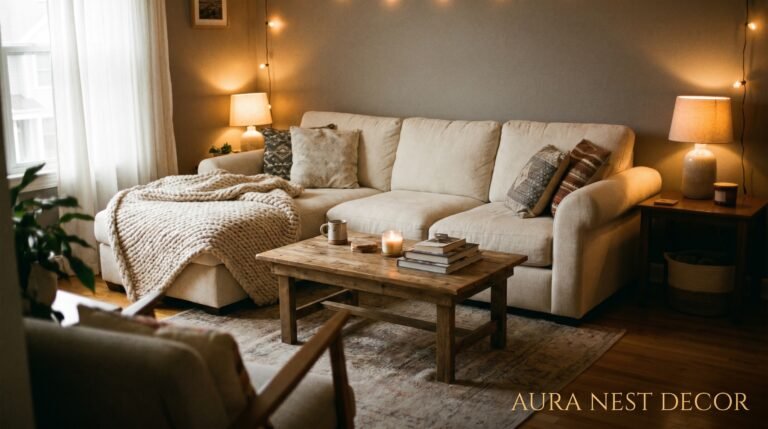
You’ve rearranged the throw pillows. You’ve found the perfect couch. And then you look up — and there it is. That big, blank wall staring back at you like an unfinished sentence. Family photos feel too expected, but also somehow exactly right. So let’s talk about how to hang them in a way that feels genuinely modern.
—
1. Why the Space Above Your Couch Feels So Hard to Get Right
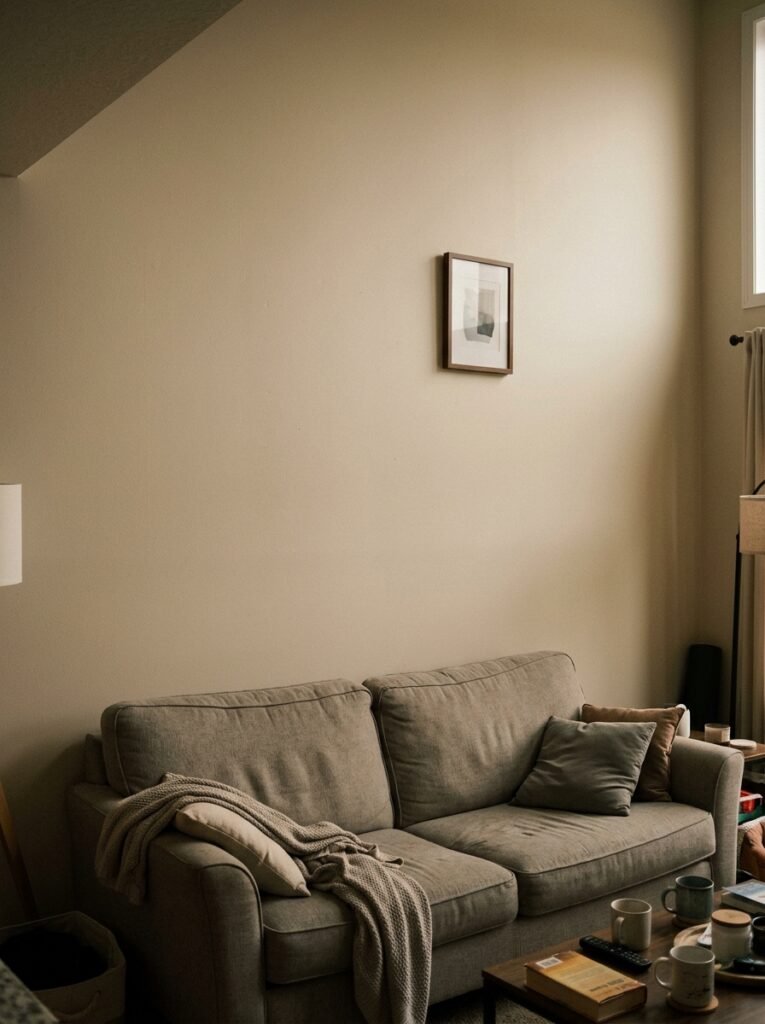
It isn’t just you. Interior designers joke about it privately because even they know: the wall above the sofa is the most anxiety-inducing stretch of vertical space in the entire house. It’s too tall to ignore, too prominent to experiment with quietly, and too personal to just throw any old art at.
The pressure is real. This is the wall people see the moment they walk into your living room. It’s the backdrop of every family gathering photo, every FaceTime call, every quiet evening you curl up with a book. It carries weight.
And family photos? They add another layer. Because suddenly you’re not just decorating — you’re curating your life. You’re choosing which moments go on display. Which versions of your family get to live on the wall. That’s a lot to ask of a few nails and some frames.
But here’s the thing most decorating advice gets wrong: they treat this wall like a style exercise when it’s actually an emotional one. The most beautiful gallery walls aren’t the ones with the perfectly matched frames or the precisely measured gaps between them. They’re the ones that feel like someone real lives there. That’s your advantage. You already have the material.
“The most beautiful gallery walls aren’t the ones with perfect frames. They’re the ones that feel like someone real lives there.”
—
2. The Frame Styles That Make Family Photos Look Genuinely Modern (Not Dated)

Let’s address the elephant in the room: the matching-frame-set-from-a-chain-store look. You know the one. Six black frames, all the same size, all the same mat, lined up in a neat row. It’s not wrong. It’s just… quiet. Safe. Easy to scroll past.
Modern doesn’t have to mean cold. And mixed doesn’t have to mean chaotic.
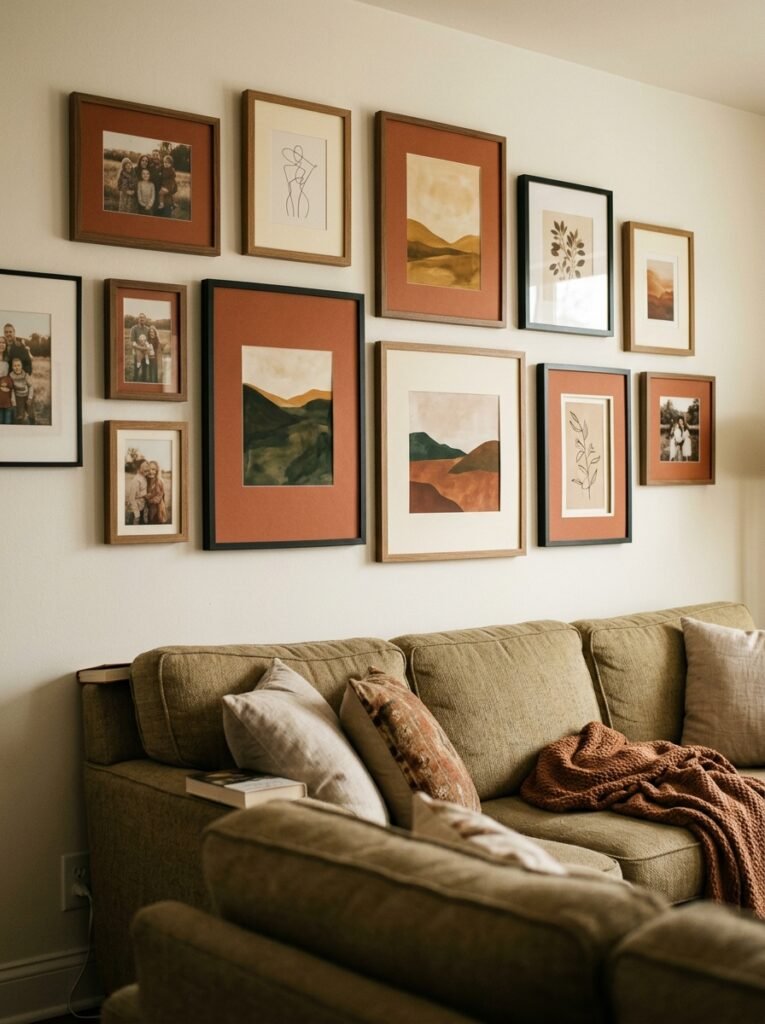
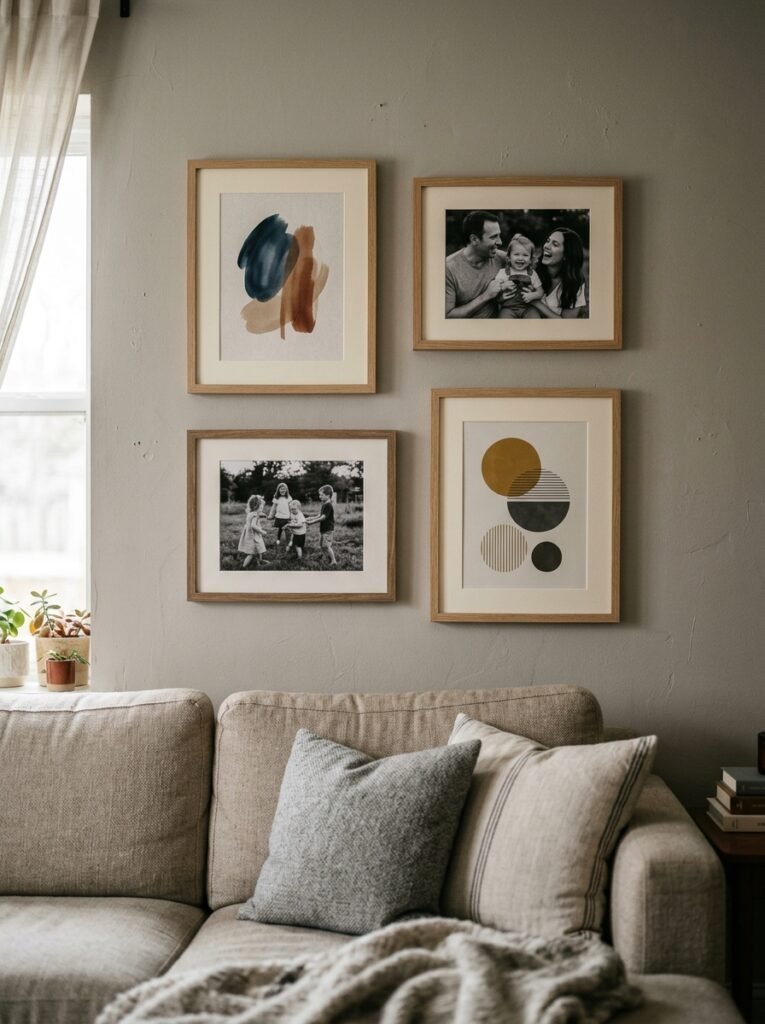
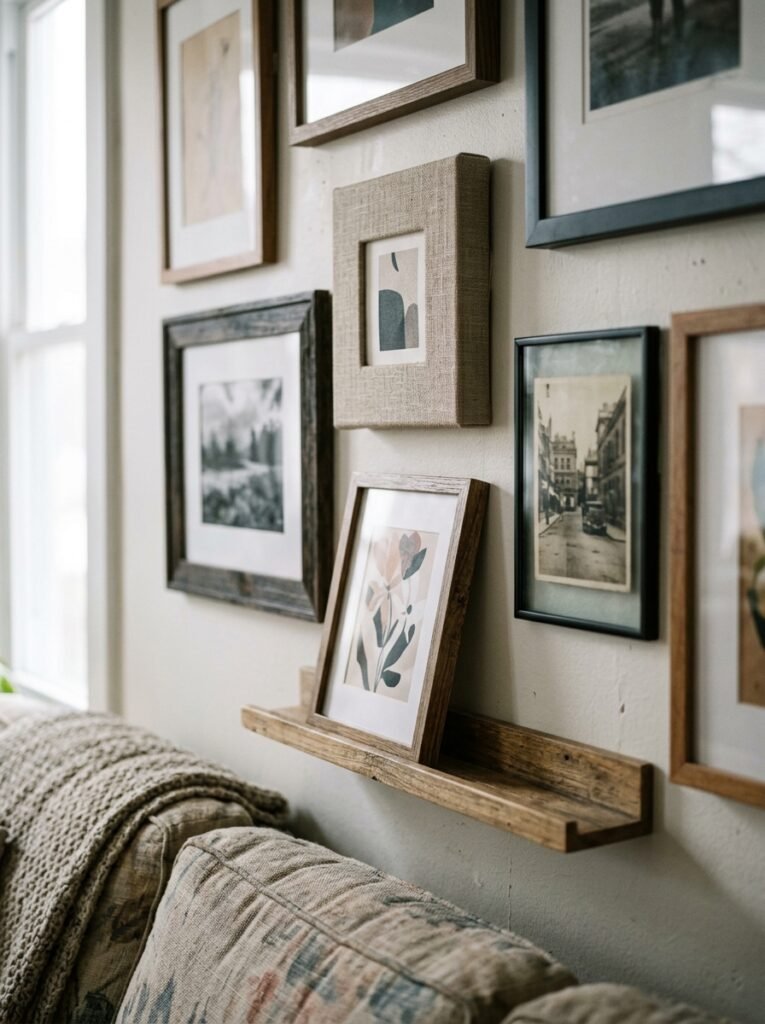
The sweet spot right now is what designers are calling “cohesive variety” — frames that share one common thread (color, material, era) while varying in shape and size. Think: all black frames but in a range of profiles, from sleek and thin to chunkier mid-century styles. Or all natural wood tones — oak, walnut, ash — at different sizes. The variety gives energy. The common thread gives calm.
Thin metal frames in brass or matte black photograph beautifully and they hold their own against bold sofas or textured walls. Chunky white frames lean more traditional but work brilliantly in a white-walled British terrace where you want warmth without clutter. Floating frames — where the print sits sandwiched between two pieces of glass — feel genuinely contemporary and make even a simple snapshot look considered.
What to avoid: ornate gold frames mixed with modern minimalist ones. The visual conversation between them is uncomfortable. Everything else is pretty much workable.
—
3. The Color That Keeps Showing Up in Every Beautiful Family Gallery Wall Right Now
It’s warm white. Not bright white. Warm white.
There’s a specific tone — somewhere between cream and linen — that’s dominating every gallery wall worth saving to a board right now. And it works because it does something subtle and clever: it makes photographs glow rather than compete with the wall behind them.
Contrast this with stark gallery white, where photos can sometimes look clinical, like specimens under glass. The warm base does something to the colors in your photos — skin tones look richer, outdoor shots look golden, black-and-white images look softer and more timeless.
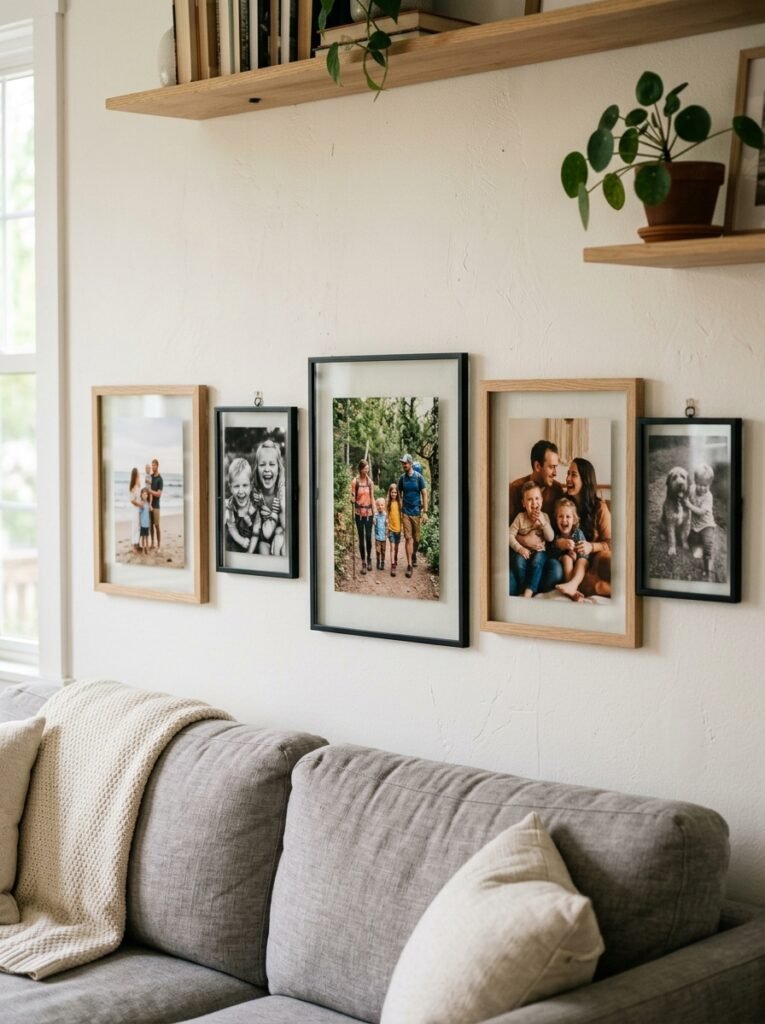
If your living room walls are already a warm white or neutral, lean into it. If you have a darker feature wall — deep navy, forest green, charcoal — your frames need to be lighter to breathe. White or natural wood works best. Against a really dark wall, a mix of black-and-white photos in white frames is genuinely stunning.
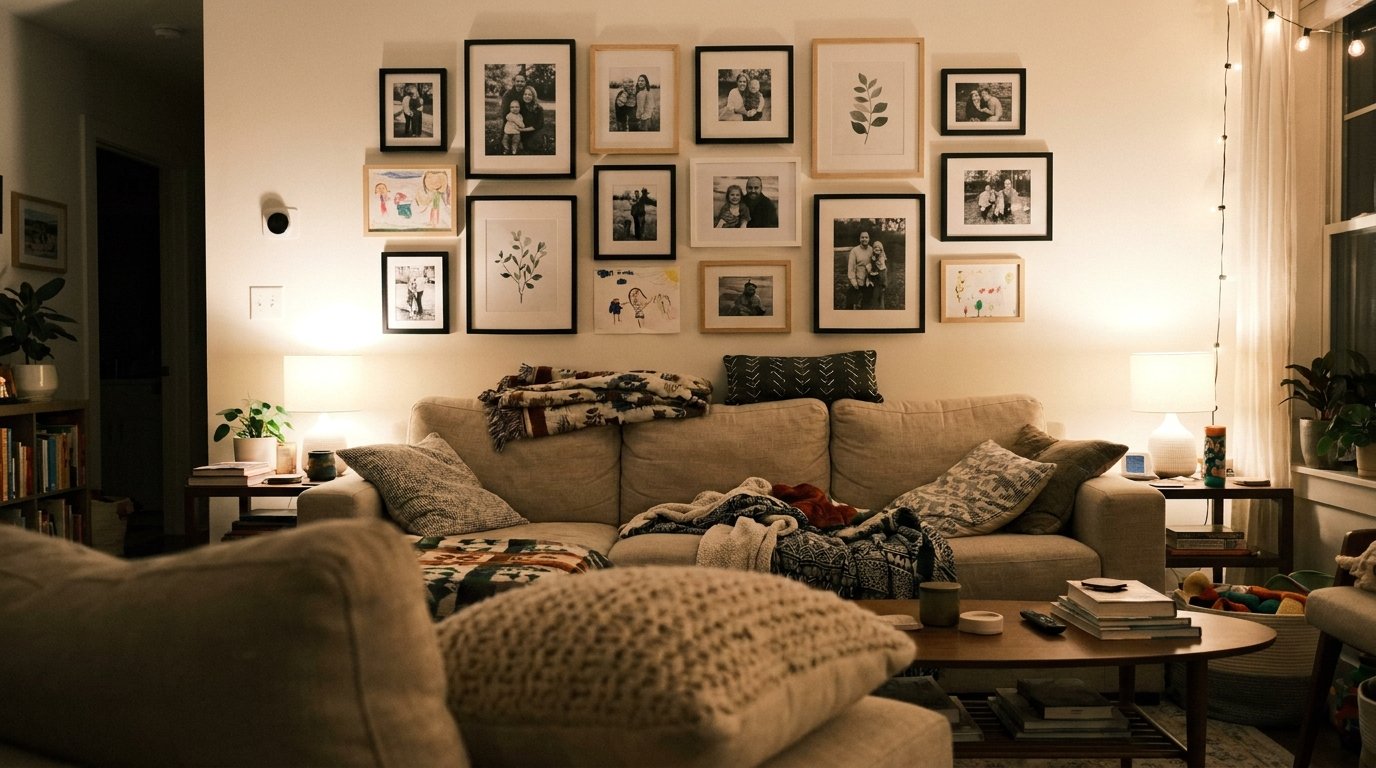
The other color moment happening right now is the single-tone edit: printing all your family photos in black and white before framing them. It creates instant visual unity. Your kids’ birthday party, your wedding day, last Christmas morning — suddenly they all speak the same visual language. It’s a small decision that changes everything.
—
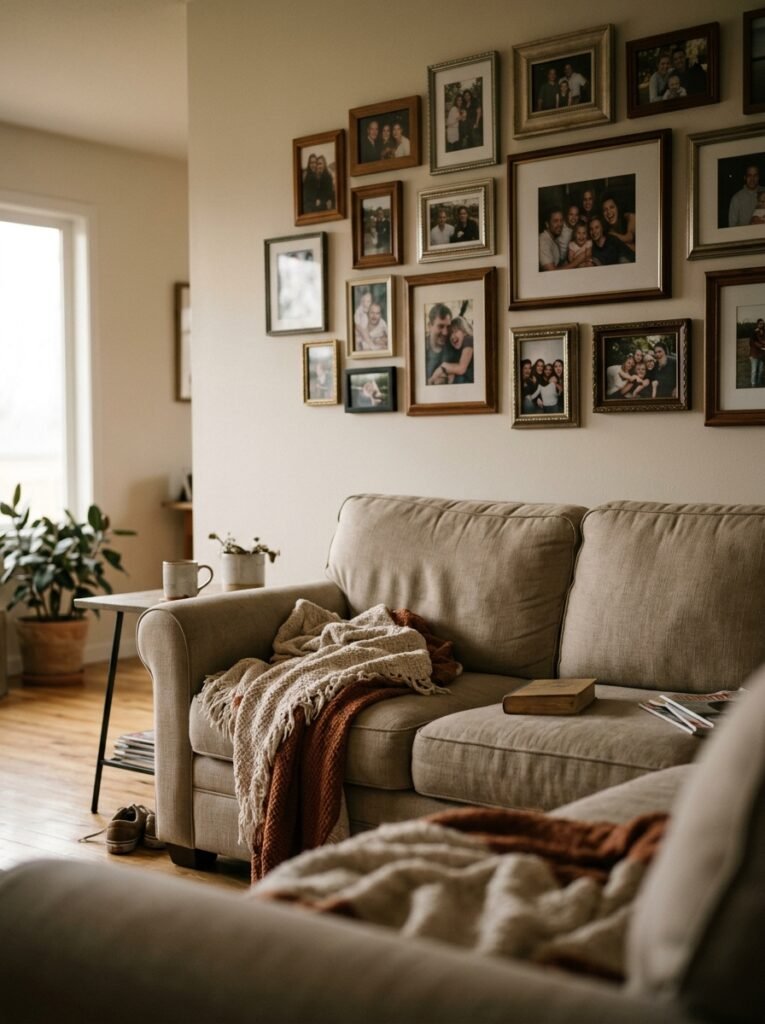
4. The Layout That Interior Designers Actually Use for Asymmetric Gallery Walls
Forget the grid. The grid had its moment — a long one — but the gallery walls that stop the scroll in 2025 are the ones that feel organic. Almost like the frames grew there.
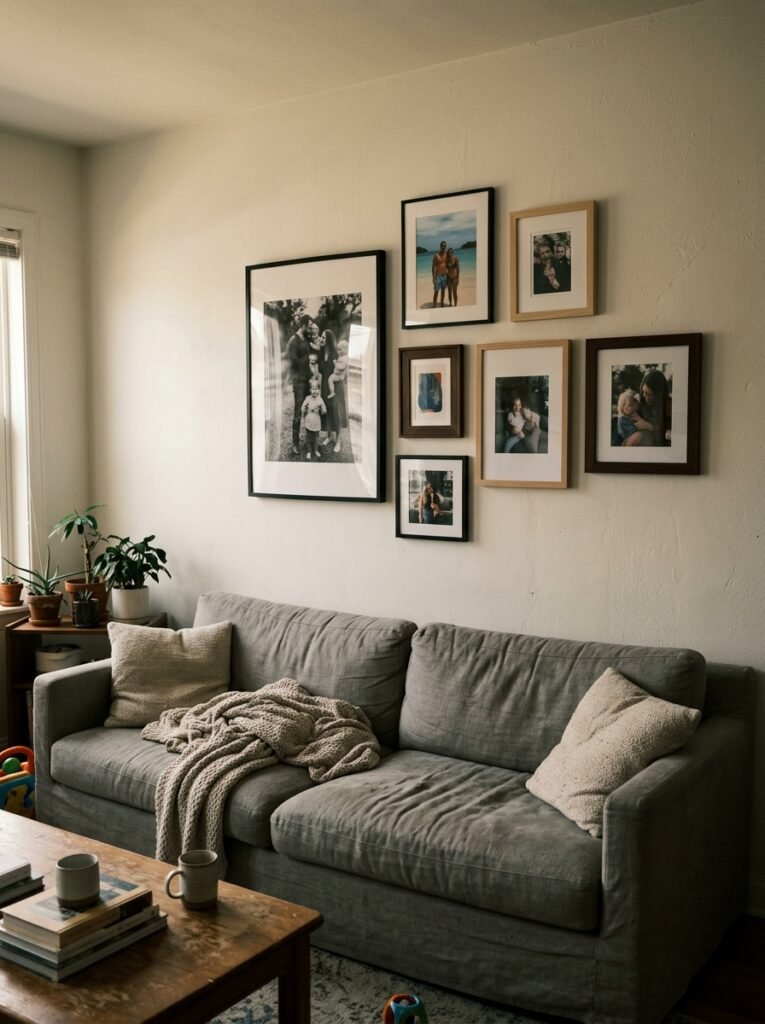
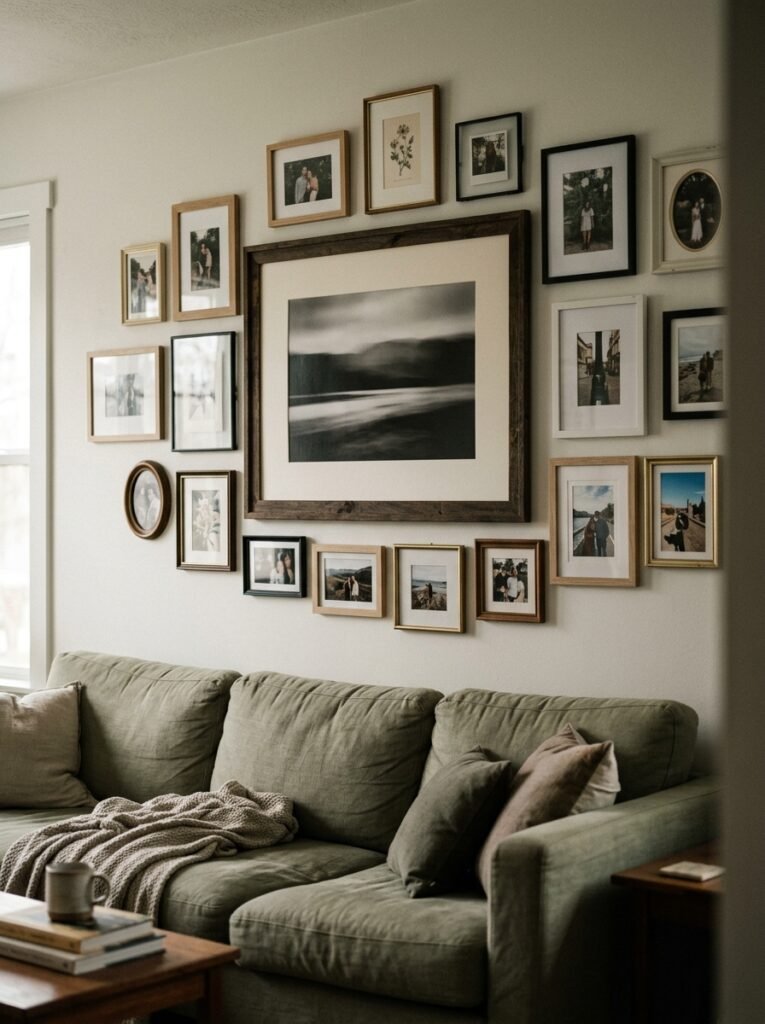
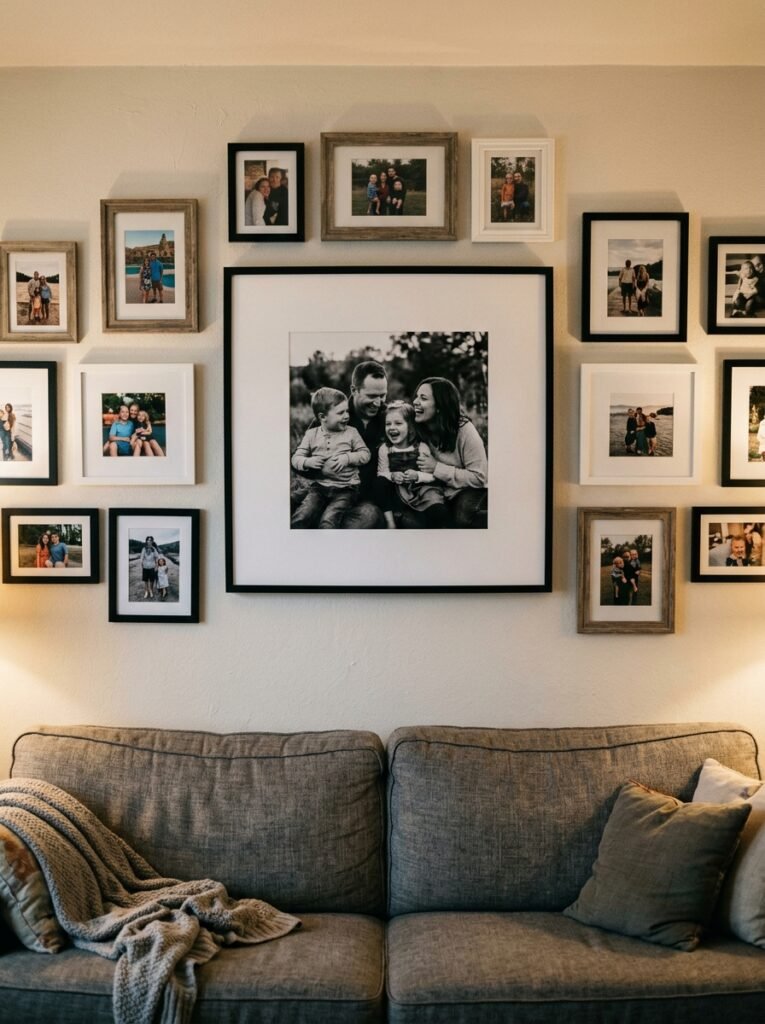
The method designers swear by is called the “anchor and orbit” approach, and once you see it, you can’t unsee it. You choose one large piece as your anchor — your biggest, most important photo or print — and then you orbit smaller pieces around it. The anchor sits slightly off-center. The smaller pieces breathe at different distances from it.
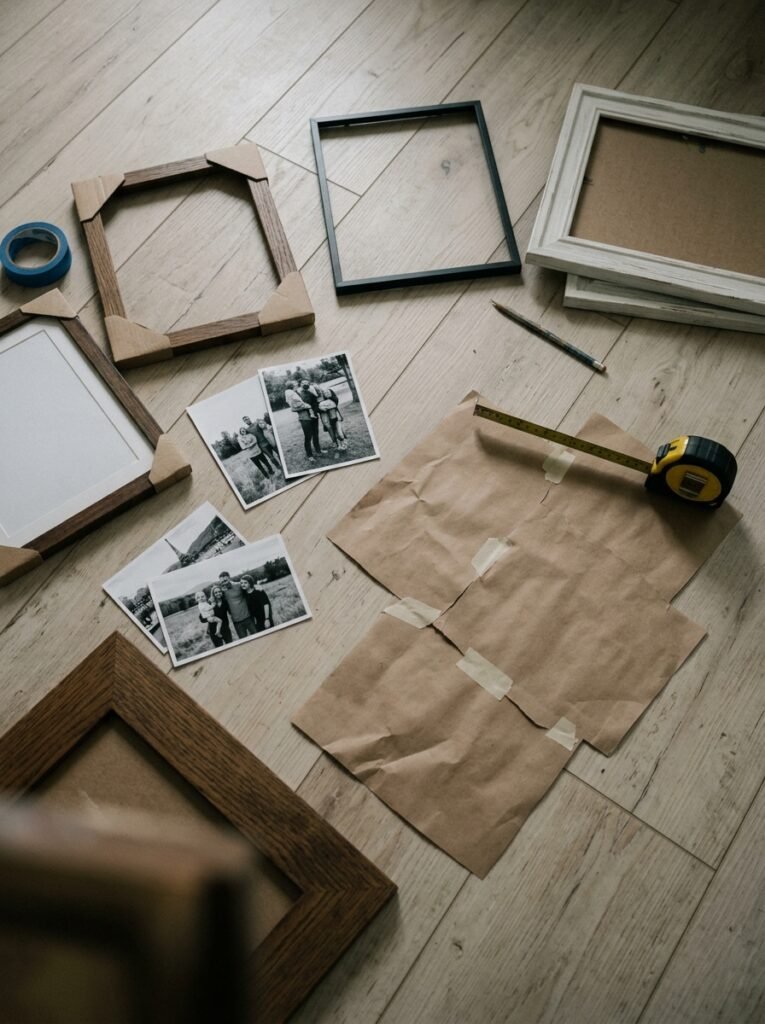
Start by tracing your frames onto brown paper (paper bags work perfectly) and cutting them out. Tape them to the wall before you pick up a single nail. Spend a day living with the paper arrangement. Shift things. Pull them closer, push them apart. The distance between frames matters enormously — too close and everything merges; too far and the wall looks lonely and confused.
The generally accepted rule is between 2 and 4 inches between frames. But break that rule intentionally: a cluster of three small frames can sit just an inch apart if they’re meant to feel like a moment-within-a-moment.
“Tape paper templates to the wall first. The best gallery walls are planned. They just never look it.”
—
5. How to Mix Family Photos with Art Without It Looking Like an Accident

This is the question I get asked more than almost any other. And the honest answer is: the mixing is actually the point.
A gallery wall that’s only family photos can tip into scrapbook territory. A wall that’s only curated art can feel impersonal — beautiful but slightly empty of life. The magic is in the tension between the two.
The key is treating your family photos with the same curatorial eye you’d give a print. Frame them properly. Give them a mat if the image benefits from breathing room. Choose your printing finish deliberately — matte for moody, everyday shots; lustre or semi-gloss for vibrant, saturated images.
Then pair them with pieces that share a feeling rather than a subject. A landscape print that matches the mood of a family holiday photo. A botanical illustration next to a photo taken in your garden. An abstract piece in the same color palette as your most-loved family portrait.
The wall above a couch in a living room in Leeds or in Louisville doesn’t need to tell a linear story. It just needs to feel coherent — like all the pieces chose to be there together.
One practical note: vary the ratio. Try 70% family photos, 30% other prints. That balance keeps the wall personal without becoming a shrine.
—
6. The One Sizing Rule That Makes Any Arrangement Look Intentional
There’s a measurement that almost no decorating article mentions, and it changes everything.
The bottom edge of your gallery wall — or your single large artwork — should hang somewhere between 8 and 10 inches above the back of your sofa. Not the seat cushions. The top of the back.
This creates the visual connection between the art and the furniture below it. Go higher and the arrangement floats, disconnected from the room. Go lower and it looks cramped. Eight to ten inches is the zone where the eye reads them as a single, composed moment.
For a gallery wall, the lowest frame in your arrangement should hit that 8-to-10-inch mark. The rest can climb as high as feels natural — there’s no ceiling rule. But that lower anchor point is your non-negotiable.
In rooms with high ceilings — common in older British houses and American craftsman homes — you can push the arrangement higher without losing the connection, but add something tall and vertical in the mix (a portrait orientation photo, a narrow print) to close the visual gap.
—
7. The Black-and-White Conversion Trick That Makes Any Photo Wall Look Curated
Here’s one of those small decisions with outsized results: before you print any family photo for your gallery wall, try converting it to black and white first.
Pull it into any photo editing app — even the free one on your phone — and strip the color. Then zoom out and look at the composition. Some photos become more powerful. Others lose their whole point. (The ones that lose their point usually relied on bright color to carry them — which is useful information.)
The photos that hold up in black and white are usually the ones worth printing at any size. Strong composition. Genuine emotion. A moment that doesn’t need a filter to land.
A wall of black-and-white family photos in mixed frames has a quality that feels editorial and intimate at once. It reads as intentional without feeling cold. And it solves the color-clash problem completely — black-and-white photos sit happily next to any sofa, any rug, any paint color you’ve ever chosen or will choose.
“A wall of black-and-white family photos reads as both editorial and intimate. It looks intentional without looking designed.”
—
8. The Piece You Should Always Put at Eye Level (and Why It’s Rarely the Biggest One)
Here’s a counterintuitive truth about gallery walls: the most important piece isn’t necessarily your largest one.
Eye level — roughly 57 to 60 inches from the floor to the center of the piece — is the sweet spot where the human eye naturally lands. Museums know this. They’ve used this measurement for decades. And it means that whatever you hang at eye level is what people will remember.
Put your most meaningful photo there. Not necessarily the most technically perfect one — the one with the most feeling. The one that makes you stop when you walk past it. Your kids at a particular age. A quiet moment that somehow captured everything.
The largest piece in your arrangement can sit above or below eye level and still anchor the whole thing visually. Size creates presence. Eye-level placement creates connection. You need both to work together.
—
9. What American and British Homes Do Differently (and What Each Can Steal from the Other)
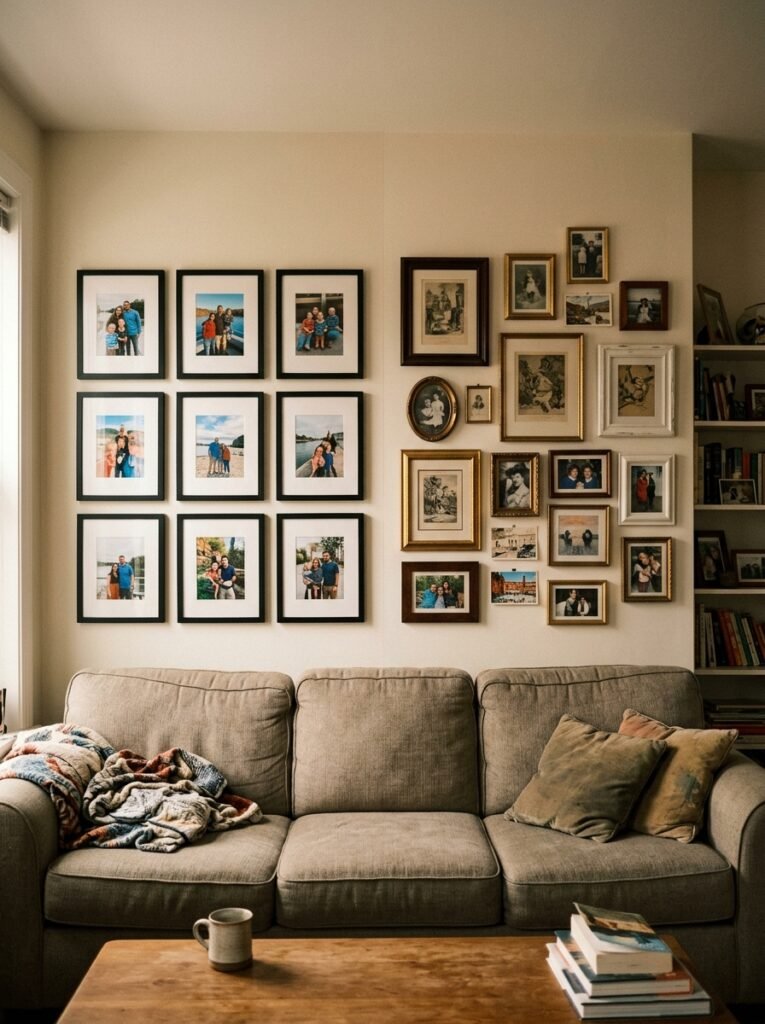
There’s a genuine stylistic difference in how gallery walls tend to appear in American versus British living rooms, and it’s worth naming because you can learn from both.
American gallery walls tend to be more maximalist — bigger, bolder, more frames, more varied sizes, sometimes spanning the entire wall behind the sofa. There’s confidence in American decorating that says: more is more if it’s done with intention. The warmth is turned up. The personal is celebrated loudly.
British gallery walls tend toward restraint. Fewer pieces. More negative space around each frame. A quiet confidence that trusts the eye to do more work. The effect is considered, slightly understated, and genuinely elegant.
The hybrid of both approaches is currently the most interesting place to work. Take the generous scale of the American approach — don’t be afraid to go big — and pair it with the British instinct for breathing room. Not every inch of wall needs filling. The gaps between frames are part of the design.
—
10. The Lighting Move That Changes the Whole Mood After Dark
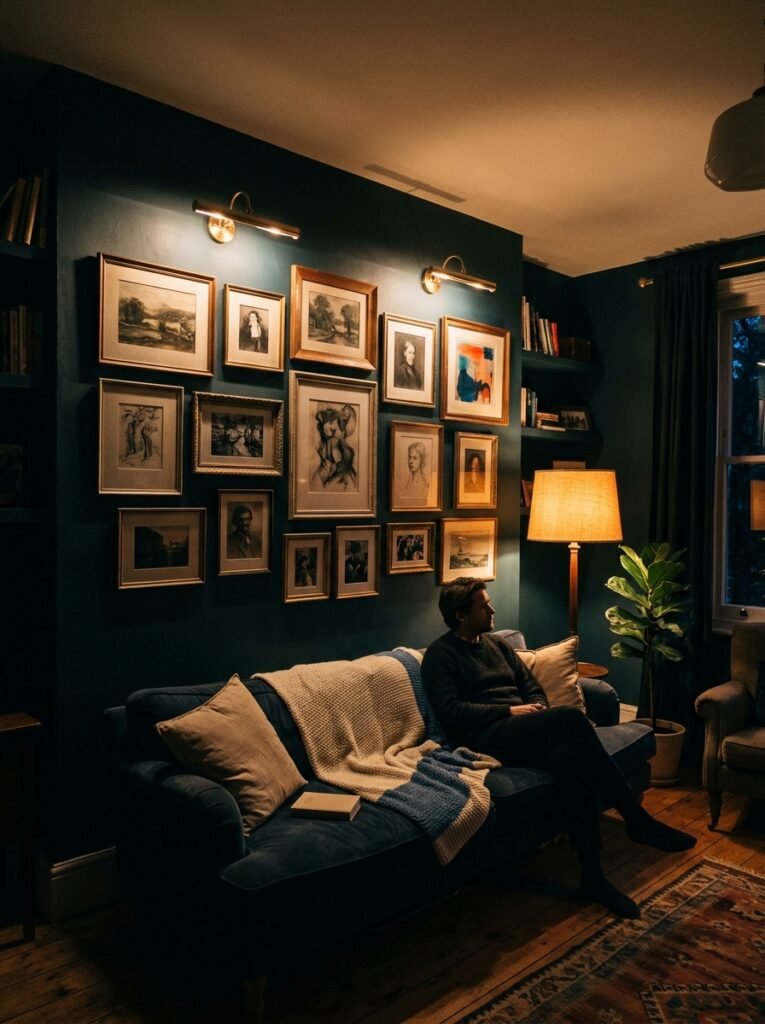
During the day, your gallery wall is lit by natural light. Fine. But what happens at 8pm when the room shifts?
Most living rooms have overhead lighting that casts everything in a flat, slightly clinical wash. Your gallery wall deserves better than that.
The answer is picture lights or directional spotlights on a track above the arrangement. A simple brass picture light mounted above a single large frame makes the whole room feel like a considered place. Track lighting with small adjustable heads lets you point light exactly where the arrangement needs it — on the anchor piece, on the photos that matter most.
The amber glow of warm-spectrum LED bulbs (aim for 2700K) at 7pm does something remarkable to a gallery wall. It makes photos look like paintings. It softens the frames. It turns the whole corner of the room into something worth sitting in front of.
This is the single most underestimated upgrade in living room decorating. Better light, better everything.
—
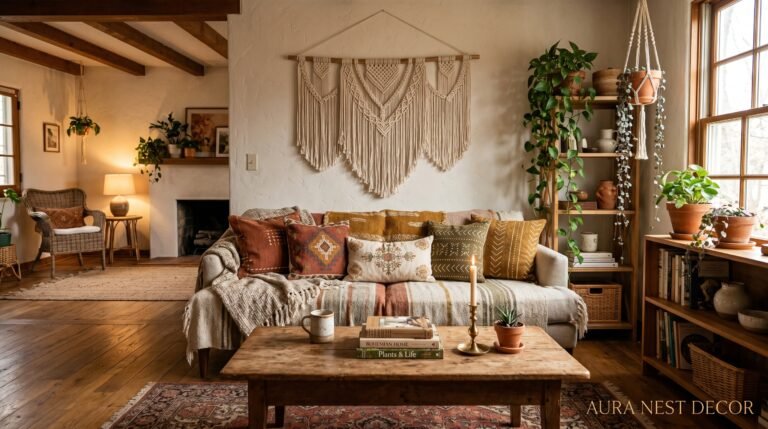
11. The Unexpected Texture That Makes a Photo Wall Feel Three-Dimensional
Most gallery walls live in two dimensions: the art, the frame, the wall. Flat, flat, flat.
Adding a single textural element changes the whole dynamic.
A small woven wall hanging between two framed photos. A ceramic wall piece hung alongside a family portrait. A pressed botanical in a deep shadow box frame, mounted next to flat prints. A mirror — even a small one — that bounces light back into the arrangement and makes the whole thing feel larger.
The texture doesn’t need to dominate. It just needs to be present enough that the eye catches it and stops. It’s the equivalent of a single interesting sentence in a paragraph of solid information — it makes everything around it more interesting by contrast.
Macramé works in certain rooms but can read as too expected now. Try unglazed ceramic discs, small sculptural shelves holding a tiny plant, or a shadow box holding an object that means something — a ticket stub, a dried flower from a significant day, a child’s first drawing.
—
12. The Photo You Haven’t Printed Yet That Should Be the Center of Everything
Here’s where I land on all of this.
The most stunning gallery walls I’ve ever seen in real homes — not staged shoots, actual lived-in rooms — all have one thing in common. There’s a photo at the center of them that clearly means more than the others. You can feel it from across the room.
It might not be the most technically perfect image. It might be slightly grainy, shot on a phone in bad light. But something happened in that frame — a laugh, a look, a moment where someone was completely themselves — and the person who printed it knew it.
That’s the photo you should find. Look through your camera roll not for the beautiful ones, but for the true ones. The image that makes your chest feel something when you scroll past it at 11pm.
Print it large. Frame it properly. Put it at eye level, eight to ten inches above your couch.
Build everything else around it.
—
🌿 Quick Tips
Think about your couch color before choosing frame finishes — a warm terracotta sofa calls for natural wood or brass; a cool grey sofa needs matte black or white frames to hold their own visually.
Never hang a single small photo above a large sofa alone. It will look lost and apologetic. Go bigger than feels comfortable — the wall can handle it.
Print photos on quality paper before they go on the wall. The difference between a standard home print and a professional lustre print is visible from the doorway.
Leave your paper templates up for at least 48 hours before committing to nails. What looks right on a Tuesday afternoon looks different on a Saturday morning with different light.
If you’re renting and can’t use nails, adhesive picture-hanging strips have genuinely improved — Command strips in the correct weight rating will hold most frames securely, and your landlord will never know they were there.
—
❓ FAQ
Q: How many photos should go in a gallery wall above a couch? A: It depends on your wall width, but as a starting point, aim for somewhere between 5 and 12 pieces for a standard sofa wall. Below 5 can feel sparse unless you’re working with very large prints; above 12 starts to feel crowded unless you have a genuinely large span of wall and a very deliberate arrangement.
Q: Should all the photos be the same size in a gallery wall? A: Mixing sizes almost always looks better than uniformity, because it creates visual rhythm. The most pleasing arrangements usually have one or two large anchor pieces (16×20 or bigger), a few medium prints, and a handful of smaller ones to fill the gaps and add detail.
Q: How do I avoid the gallery wall looking too cluttered or overwhelming? A: Stick to one common element across all the frames — whether that’s color, material, or finish — and be intentional about the spacing between pieces. Consistent 2-to-3-inch gaps between frames give the whole arrangement a sense of order even when the sizes and subjects vary wildly.
—
💭 Final Thought
The wall above your couch doesn’t need to be finished. It just needs to be started. Hang one photo you love — the real one, the true one — and let the rest of it come together around it over months and years. The most personal walls in the most beautiful homes were never planned all at once. They accumulated, like a life does. What does your wall say about yours so far?