
Interior Rendering: The Art of Seeing Your Dream Home Before It Exists
There’s something quietly magical about standing in an empty room and being able to see — not just imagine, but actually see — exactly what it will become. Interior rendering makes that possible, and once you understand it, you’ll never approach a design project the same way again.
—
1. What Interior Rendering Actually Is (And Why It Changes Everything)
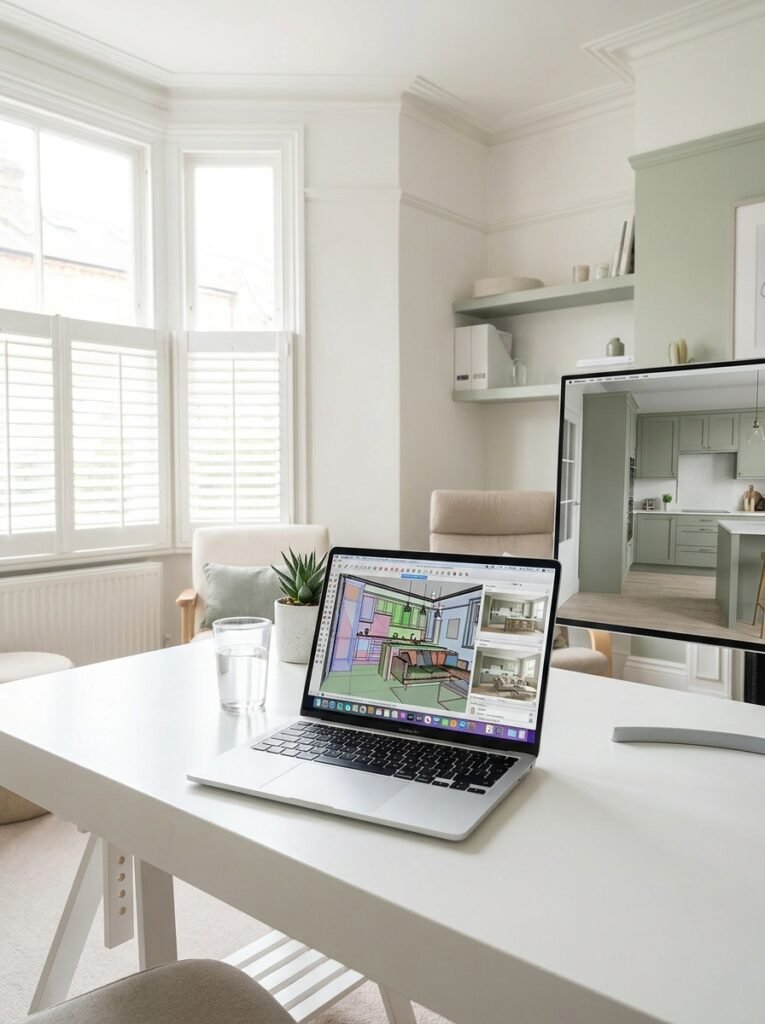
Interior rendering is the process of creating a photorealistic or stylized digital image of a space before that space is built, renovated, or decorated. Using specialized software, designers and homeowners can visualize furniture placement, lighting, color palettes, textures, and materials — all without moving a single piece of furniture or painting a single wall.
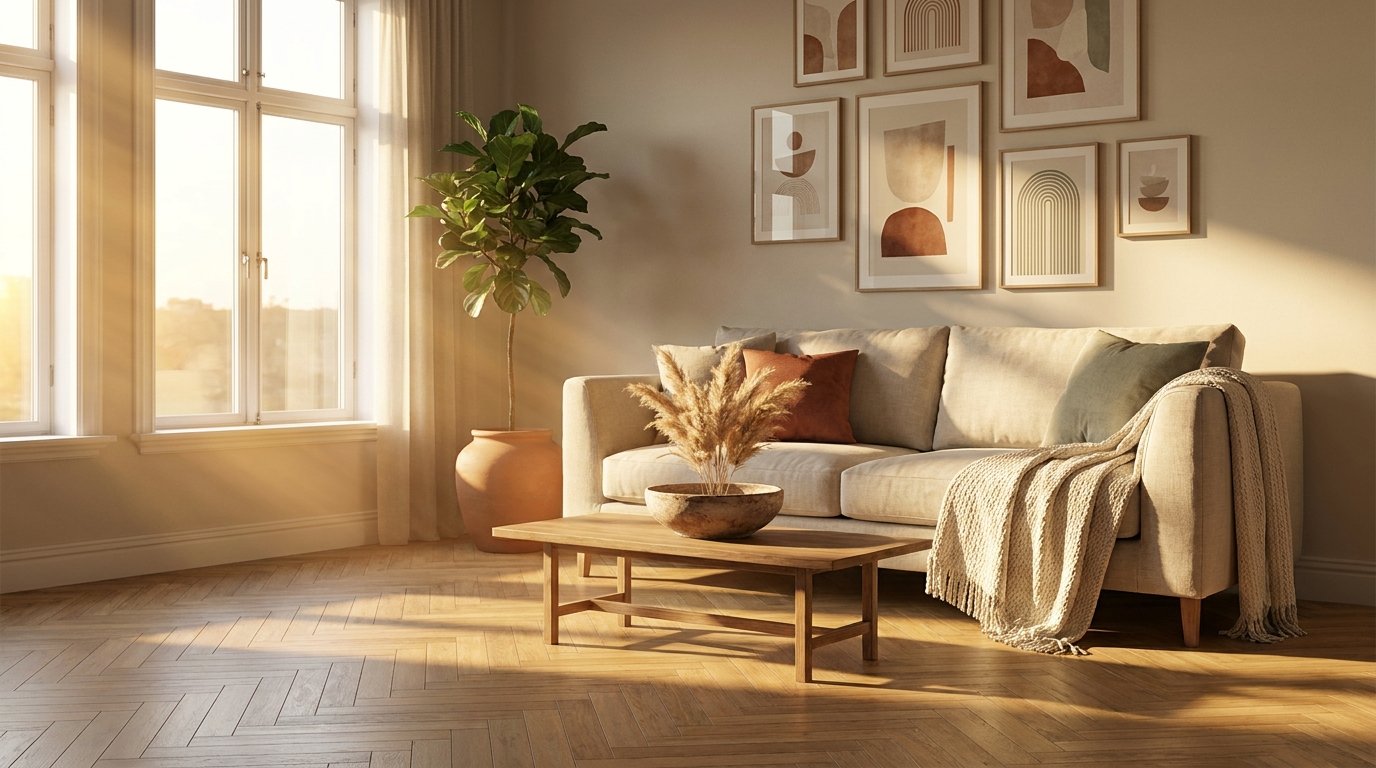
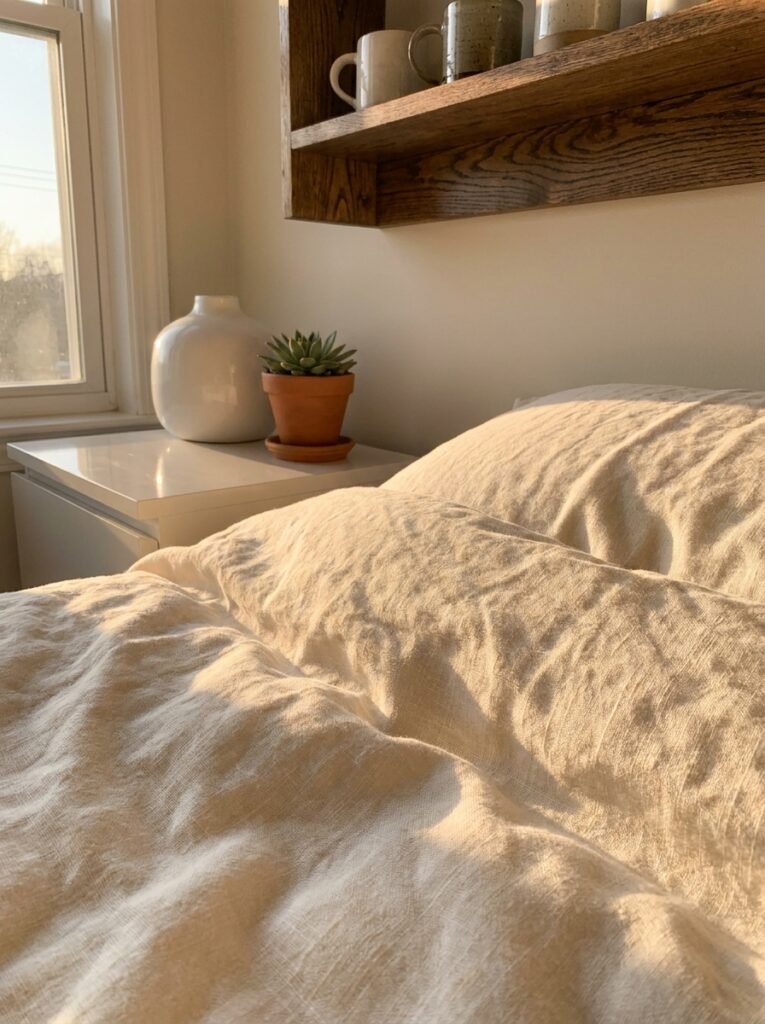
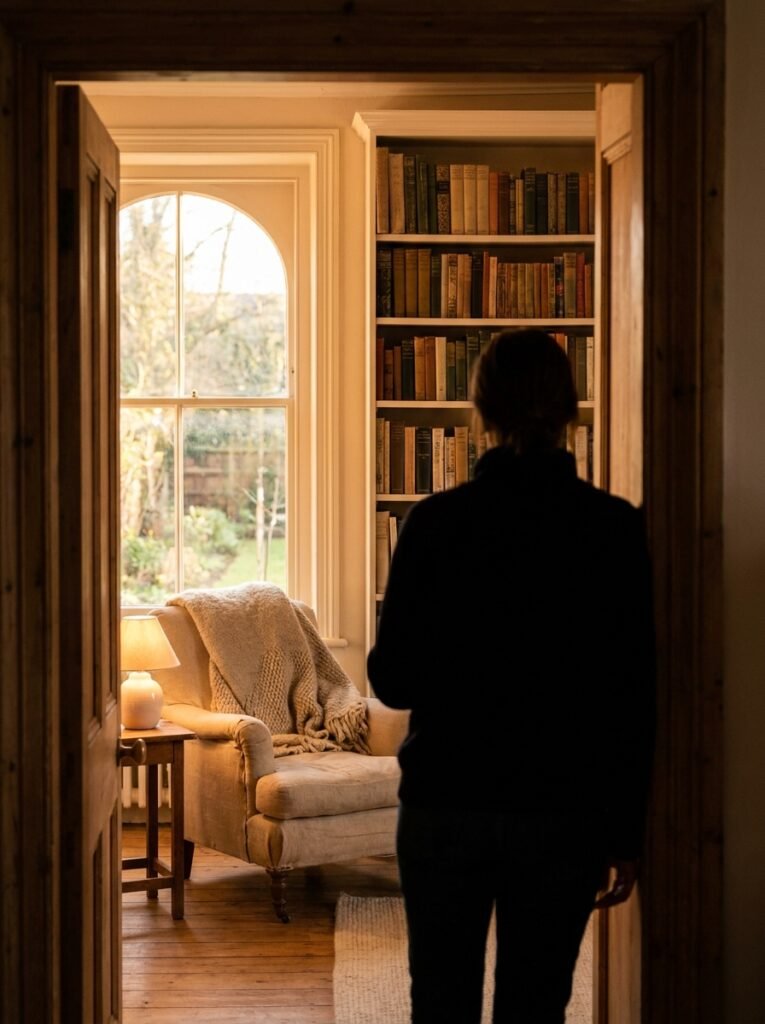
Think of it like a photograph taken in the future. The room doesn’t exist yet in the physical world, but there it is on your screen: sunlight streaming through a west-facing window, casting warm golden light over a linen sofa, a bowl of dried pampas grass on the coffee table, and a gallery wall arranged exactly the way you’d hoped. You can see it. You can feel it. And that feeling — that emotional confirmation — is exactly what makes rendering so powerful for the design process.
For Pinterest bloggers specifically, rendered images have become some of the most-saved, most-shared content on the platform. They’re aspirational by nature. They’re polished without being sterile. And they tell a visual story that pulls people into a world they want to live in.
“A great interior render doesn’t just show you a room — it shows you a life.”
—
2. The Quiet Revolution Happening in Home Design
Not long ago, interior rendering was exclusively the territory of high-end architecture firms. The software cost tens of thousands of dollars, required specialized training, and took days to produce a single image. Most homeowners simply looked at paint swatches, crossed their fingers, and hoped for the best.
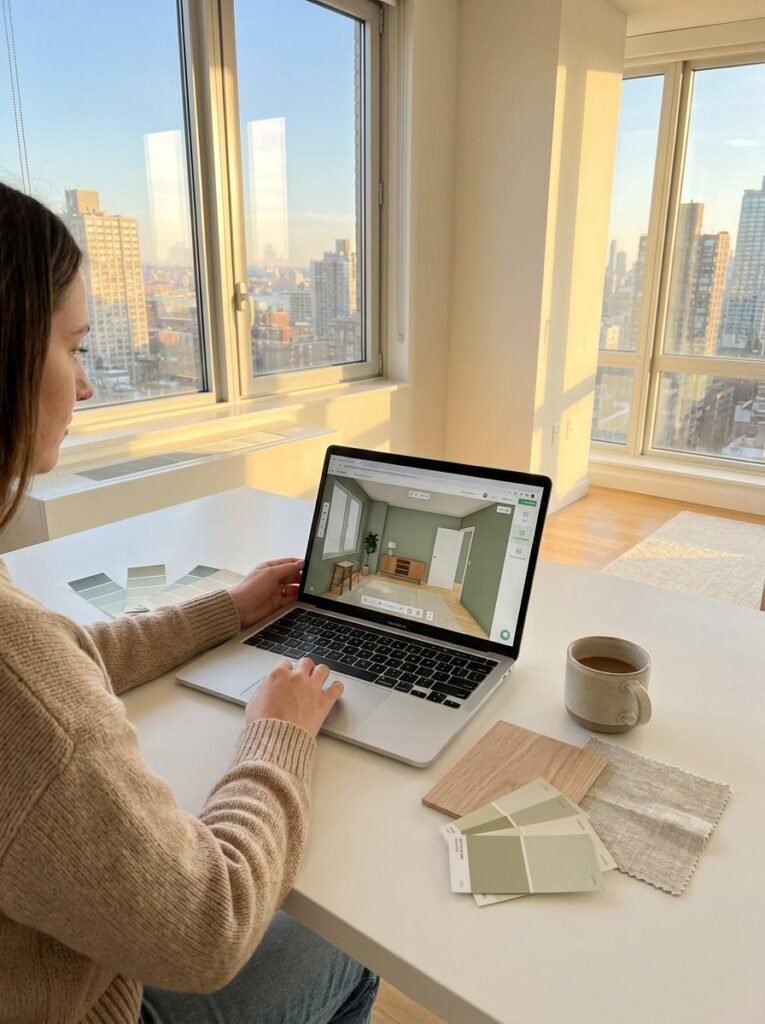
That world has changed entirely. Today, rendering tools are accessible, affordable, and in some cases completely free. Apps like Planner 5D, Roomstyler, and SketchUp Free have opened the door for everyday people — renters decorating a first apartment, families renovating a kitchen, bloggers building a visual brand — to create stunning, believable design visualizations on a laptop or even a phone.
This democratization of design is one of the most significant shifts in how people relate to their living spaces. When you can see the result, you make bolder choices. You commit more confidently. You avoid costly mistakes. And you feel something most design processes never used to allow for: a sense of genuine excitement and ownership before the first hammer swings.
—
3. The Difference Between a Render and a Mood Board (And Why Both Matter)
Here’s a question worth sitting with: if mood boards and inspiration collages have served designers for decades, why does rendering matter at all?
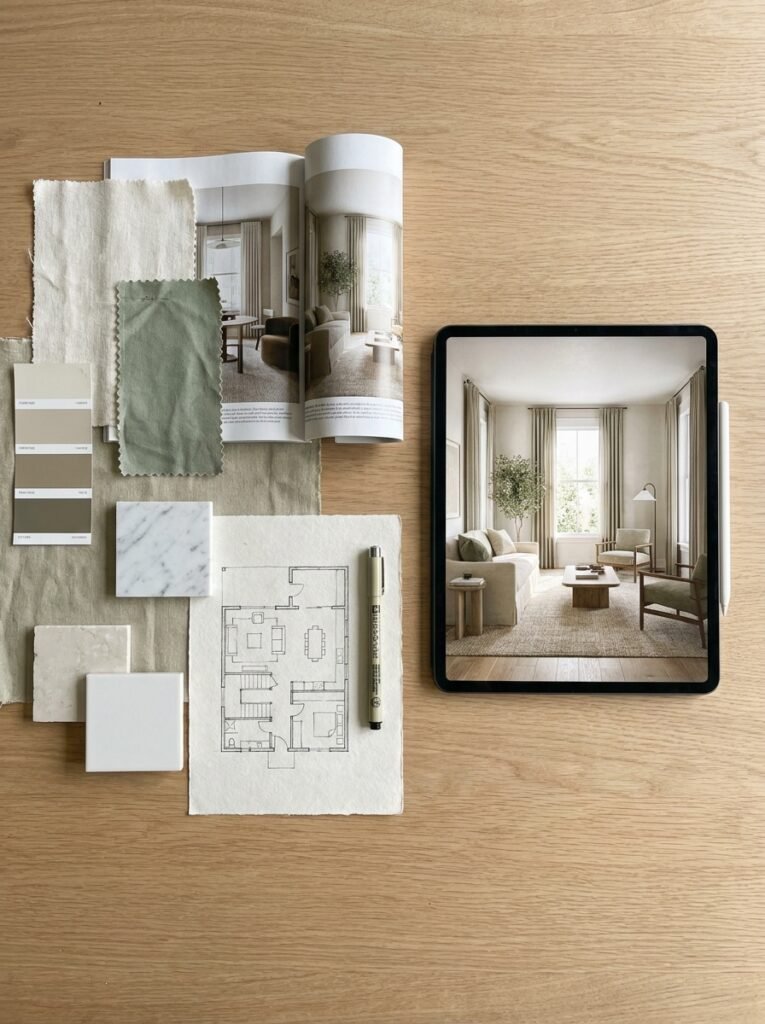
The answer lies in specificity. A mood board collects references — images from different rooms, different homes, different contexts — and assembles them into a visual direction. It communicates a feeling, a palette, a general atmosphere. Mood boards are essential, and they’re incredibly powerful for early-stage exploration.
But a render is something different. A render shows your specific room, with your actual dimensions, populated with your chosen pieces, lit by your real window placements. It transforms inspiration into a plan. It answers the question a mood board can never fully answer: will this actually work in my space?
For bloggers creating content about interior design, understanding this distinction lets you create more helpful, more trustworthy content. When you can tell your readers not just “here’s what I loved” but “here’s how I tested it visually before committing,” your content earns a different kind of credibility — the kind that builds loyal, returning audiences.
—
4. The Technology Behind the Magic (Explained Simply)
You don’t need a computer science degree to understand rendering, but knowing the basics makes you a smarter consumer of the process. At its core, rendering works by using algorithms to simulate how light behaves in a physical space.
When a 3D model of a room is built in software, the designer assigns materials to every surface — a matte finish to the walls, a semi-gloss to the cabinetry, a soft pile to the area rug. Light sources are placed: a ceiling fixture here, a floor lamp there, natural light entering from a window facing northwest. The rendering engine then calculates how that light would bounce, diffuse, cast shadows, and interact with every material in the scene.
The result is an image that looks photographed, not drawn. Reflections appear in glossy surfaces. Shadows fall softly across a linen duvet. Wood grain catches the afternoon light the way real wood would. This level of realism is why rendered images perform so exceptionally well on Pinterest — they satisfy the eye’s desire for beauty while simultaneously offering practical, actionable design information.
—
5. Why Pinterest and Interior Rendering Are a Perfect Match
Pinterest isn’t just a social media platform — it’s a search engine for beautiful ideas. People come to Pinterest with intention. They’re planning a kitchen renovation. They’re looking for living room color schemes. They’re searching for what their bedroom could feel like six months from now. This is an audience in active, aspirational pursuit of transformation.
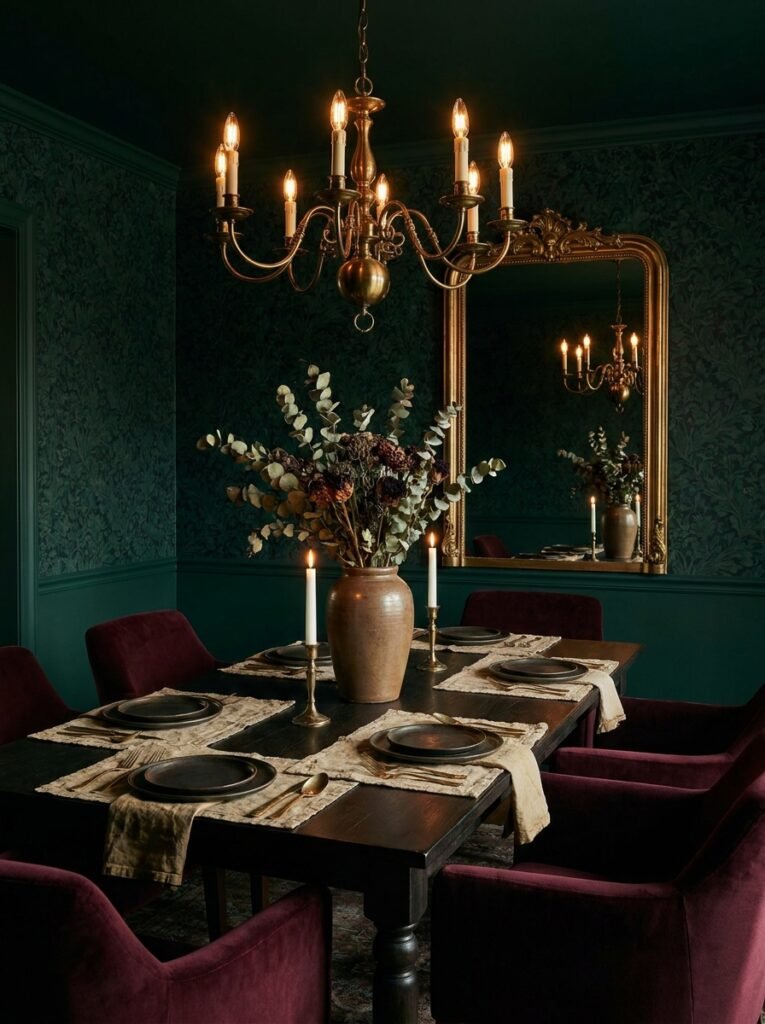
Interior rendering content feeds that hunger perfectly. A rendered image of a moody, jewel-toned dining room gives the Pinterest user something specific to react to. They can see the dark green wallpaper, the aged brass chandelier, the velvet chairs in burgundy. They can decide whether it’s theirs or not. That specificity — that emotional clarity — is what drives saves and shares.
For bloggers creating this content, rendered images also solve a practical problem: you don’t need to own a beautifully designed space to post stunning interior content. You can design it digitally, render it beautifully, write about the choices you made and why — and your audience gets every bit of the value they came for.
“On Pinterest, the image is the first sentence. Make sure it says something worth reading.”
—
6. Choosing the Right Rendering Style for Your Aesthetic
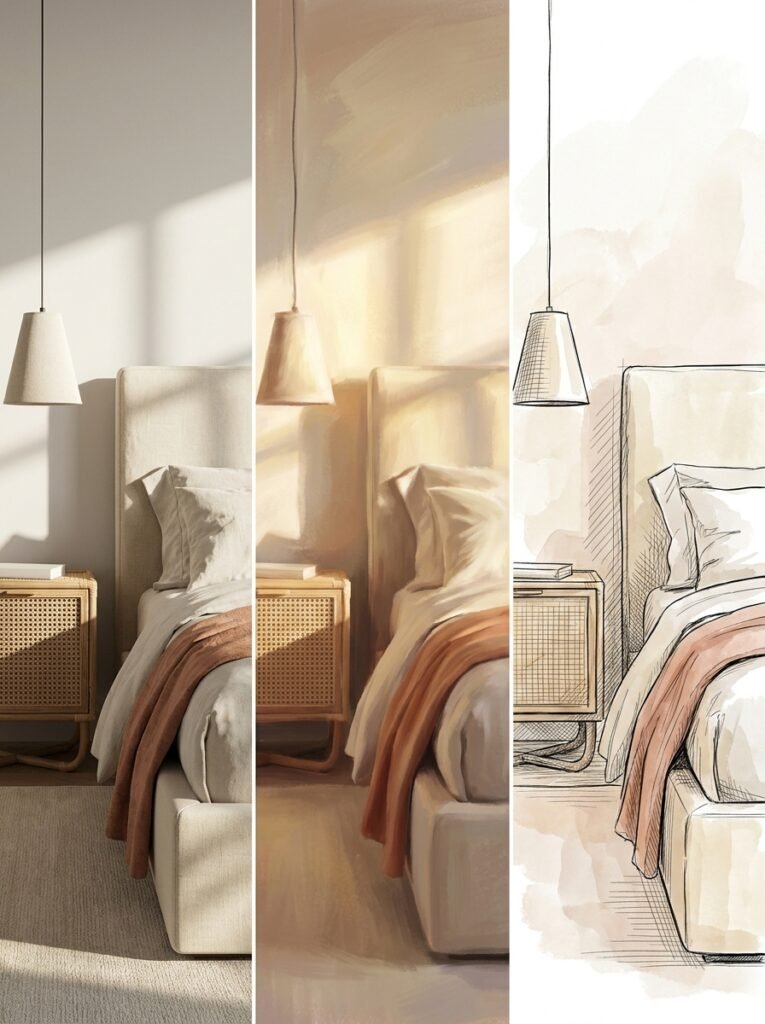
Not all renders look the same, and this matters enormously for building a cohesive visual brand on Pinterest. Photorealistic rendering aims to be indistinguishable from a real photograph, with accurate light simulation and material representation. It’s stunning, it performs well, and it requires either skilled software or a learning curve.
Stylized or illustrative rendering, on the other hand, leans into a more drawn or painterly aesthetic. Think warm, slightly softened images with gentle color grading — the kind that feel more like a dream than a photograph. This style has enormous appeal on Pinterest because it creates emotional warmth that hyper-realism sometimes lacks.
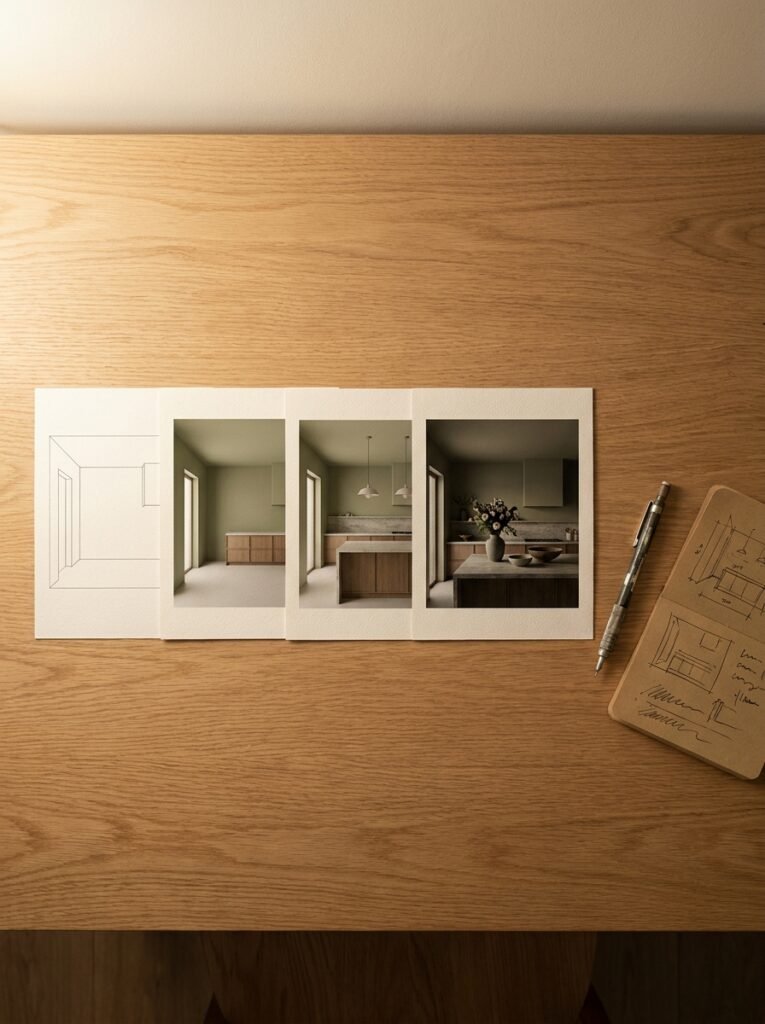
Then there’s the sketch or line-drawing render, which is less about final presentation and more about process and planning. Showing your audience a sketch render alongside a finished render tells a compelling story of transformation — and stories always outperform static images in terms of engagement.
Choose the rendering style that aligns with your content’s emotional promise. If your brand is “cozy, achievable, real-home inspiration,” a slightly soft, warm stylized render will resonate more than a cold, hyper-precise photorealistic image. Consistency in rendering style becomes as much a part of your visual brand as your color palette or your logo.
—
7. The Emotional Weight of Seeing Your Home Before It Exists
There’s a layer to interior rendering that rarely gets discussed in technical tutorials, and it’s perhaps the most important layer of all: the emotional one. When someone sees a render of a space they’re planning — their future living room, their child’s nursery, their first owned home — something shifts.
Fear dissolves. So much of the anxiety around home design comes from uncertainty. Will these colors clash? Will this furniture feel too big? Will the room feel cold or warm? A render answers those questions before they become expensive regrets. And when anxiety dissolves, excitement takes its place. Genuine, forward-leaning excitement about the space you’re creating.
That emotional shift is exactly what you want your readers to feel when they encounter your content. Give them a render — or teach them to create one — and you’re not just giving them a pretty image. You’re giving them the gift of certainty. You’re saying: you can do this, and here’s proof.
—
8. Free and Affordable Tools That Make Rendering Accessible
Let’s get practical. The following tools represent genuinely excellent options for bloggers and home designers at various experience levels.
Planner 5D is browser and app-based, beginner-friendly, and capable of producing attractive rendered images with relatively little technical knowledge. Its furniture library is extensive, its interface is intuitive, and the renders it produces are more than good enough for high-quality blog content.
SketchUp Free is a step up in complexity but rewards the learning curve with significantly more control over spatial design. Paired with the Enscape or V-Ray render plugin (both paid, but often available with educational discounts), SketchUp can produce genuinely professional results.
Canva has recently introduced interior design template features that, while not traditional 3D rendering, allow bloggers to create visually polished room concept layouts quickly and effectively — particularly useful for social content.
For those willing to invest in a professional tool, Lumion is widely regarded as one of the most beautiful real-time rendering engines available, producing images of extraordinary warmth and realism. Many interior design bloggers who monetize through affiliate partnerships or design consultations find the investment pays for itself quickly.
—
9. How Rendered Images Perform Better in Pinterest SEO
Pinterest’s algorithm rewards content that gets saved and clicked — and the clearest driver of both behaviors is image quality combined with relevant, specific text. A rendered interior image that clearly communicates a specific style (“moody maximalist bedroom,” “warm minimalist kitchen,” “bohemian home office”) gives the algorithm exactly what it needs to surface your content to the right audience.
When you publish a blog post built around a rendered image, you’re also creating keyword-rich content that Pinterest can index. Your pin description, your blog title, your alt text, and your section headers all work together to signal to Pinterest what your content is about and who should see it.
“Pinterest doesn’t reward perfection — it rewards specificity. Show people exactly what they were already dreaming of.”
The most successful interior design bloggers on Pinterest treat their renders the same way food bloggers treat their recipe photography: as the centerpiece of the content strategy, not an afterthought. Every other element — the headline, the blog text, the pin description — exists to support that central image and earn its click.
—
10. Common Rendering Mistakes That Undercut Your Work
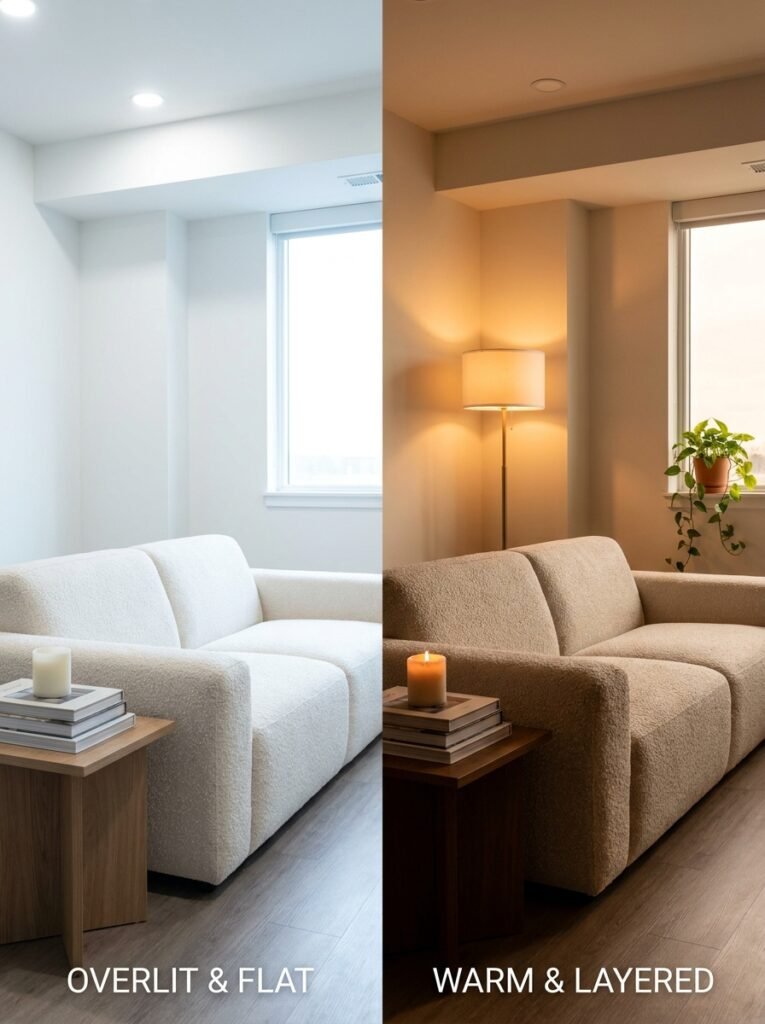
Even beautiful renders can fall flat if certain mistakes creep in. The most common is overlighting — flooding a render with so much light that shadows disappear, surfaces lose texture, and the space feels clinical rather than lived-in. Real rooms have variation. They have corners that are slightly dim, surfaces that absorb light differently, windows that create contrast. Embrace that variation rather than trying to eliminate it.
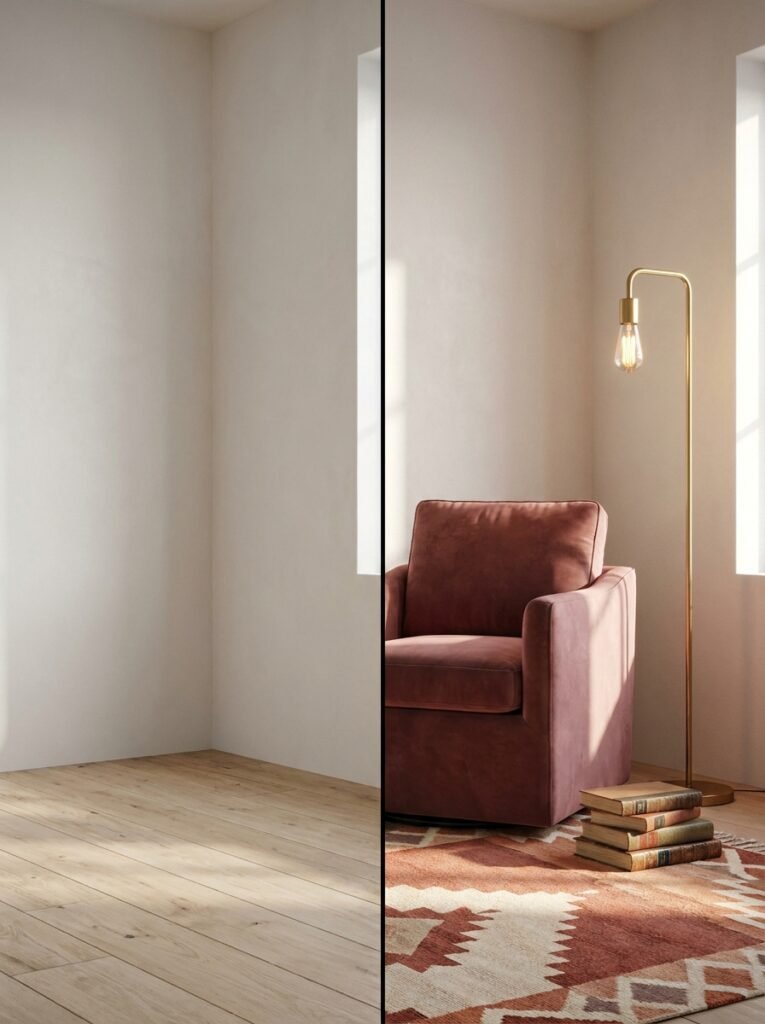
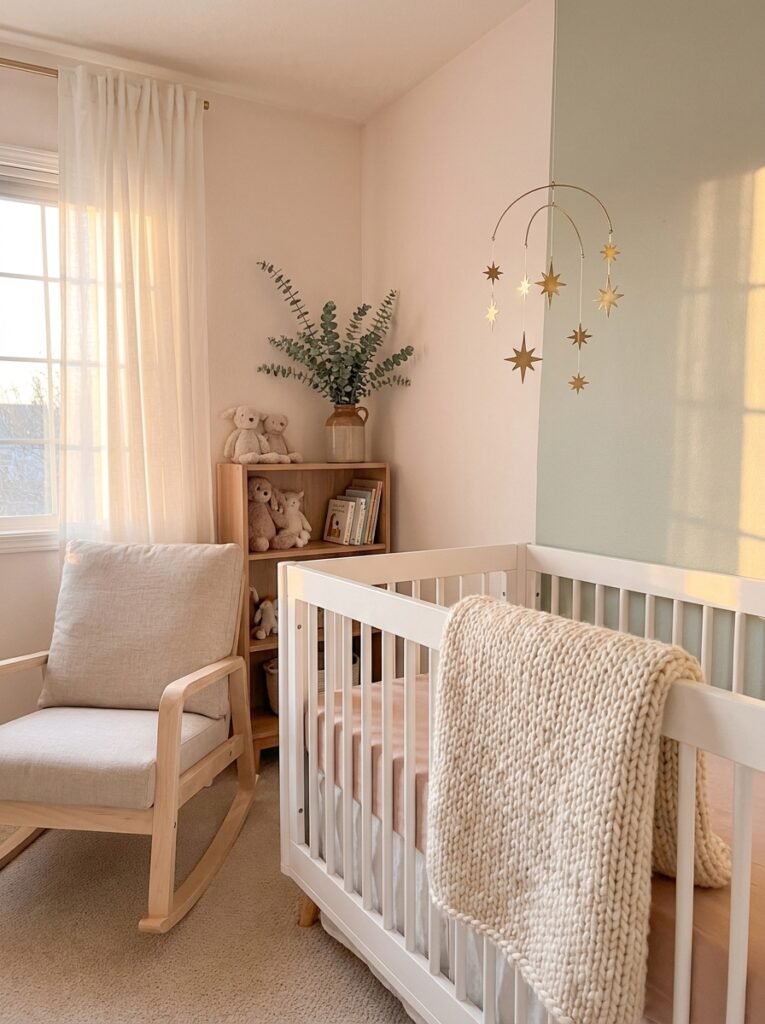
A second common mistake is under-styling. A render that contains only furniture against a perfectly white wall might demonstrate spatial planning, but it doesn’t evoke feeling. Add the small things: a stack of books, a throw draped over a chair arm, a plant catching the window light, a half-burned candle on a side table. These details are what Pinterest users zoom in on. They’re the things that make a space feel human.
The third mistake is inconsistent scale. Nothing breaks the believability of a render faster than a sofa that’s the wrong size relative to the room, or a ceiling that feels impossibly high. Take the time to input accurate room dimensions before you begin designing. The render will reward your precision.
—
11. Building a Content Series Around Interior Rendering
Here’s an idea that top Pinterest bloggers use to compound their reach: rather than publishing individual render posts, build a series. “Rendering My Dream Kitchen: Part One — The Layout” leads naturally into Part Two (the color palette), Part Three (the lighting plan), and Part Four (the final render reveal). This approach does several things simultaneously.
It keeps your audience coming back. It creates a narrative arc that readers emotionally invest in. It generates multiple pieces of content from a single project. And it allows each post to be keyword-optimized for a different search term — “kitchen layout ideas,” “kitchen color palette gray,” “kitchen lighting over island” — while all pointing back to the same central story.
Series content also performs exceptionally well for Pinterest group boards, where curators are always looking for quality content that fits a theme and adds genuine value to their community. A rendering series positions you as an expert documenting a real creative process, which is far more compelling — and far more trustworthy — than a single aspirational image with no context.
—
12. The Future of Interior Rendering: Where It’s All Heading
AI is already transforming interior rendering in ways that were unimaginable just three years ago. Tools like Midjourney and Adobe Firefly can generate photorealistic interior images from text prompts in seconds. Tools like RoomGPT allow users to upload a photo of their existing room and receive AI-rendered redesigns instantly. This is not a distant future — it’s the present.
For bloggers, this creates extraordinary opportunity. The barrier to producing stunning visual content is lower than ever. But it also raises the stakes for originality and voice. When anyone can generate a beautiful kitchen render with a single text prompt, what sets your content apart is no longer the image alone — it’s your perspective, your story, your design philosophy, your authentic human voice explaining why you made the choices you made and what it felt like to see your vision come to life.
The future of interior rendering content is not about the technology. It’s about the human being standing behind it, interpreting it, and sharing it with vulnerability and genuine expertise.
—
🌿 How to Start Interior Rendering (Even If You’ve Never Tried It)
Starting with interior rendering can feel intimidating, but the honest truth is that the first step is far simpler than most people expect. Begin with your actual room dimensions — measure the length, width, and ceiling height carefully. Accurate measurements are the foundation of a believable render.
Choose a beginner-friendly tool like Planner 5D and spend 30 minutes just exploring. Don’t try to build a perfect room on your first session. Experiment with placing furniture, adjusting a wall color, moving a window. Get comfortable with the interface before you try to create something shareable.
When you’re ready to style your render, reference real rooms you love — not to copy them, but to understand what specific elements create the mood you’re after. Is it the ratio of light surfaces to dark? The density of textures? The mix of heights in the furniture? Identify the specific choices, then replicate the principle in your own design.
Finally, save multiple versions. Change one variable — the rug color, the wall finish, the lighting warmth — and compare the results. This iterative process teaches you more about design instinct than any tutorial can, and it gives you rich comparative content your audience will find genuinely useful.
—
❓ FAQ
Q: Do I need professional design training to create interior renders? A: Not at all. Many of the most popular rendering tools are designed specifically for beginners and require no technical background. With a few hours of exploration and a willingness to experiment, most people can produce renders that are genuinely impressive. The design instinct develops with practice, not with credentials.
Q: Can I use AI-generated interior renders on my blog and Pinterest without copyright issues? A: Generally, images generated by AI tools using your own prompts are considered yours to use, but the rules vary by platform and tool — always check the terms of service for the specific tool you’re using. For commercially monetized content, it’s worth spending an extra few minutes confirming you have full rights to publish and profit from what you’ve created.
Q: How long does it take to create a quality interior render? A: It depends heavily on the tool and your experience level. A beginner using Planner 5D might produce a usable render in two to three hours for a simple room. A more experienced designer using professional software might spend a full day on a complex, photorealistic scene. As you develop your workflow, the process becomes significantly faster — and the results improve alongside the efficiency.
—
💭 Final Thought
Interior rendering is, at its heart, an act of hope. It’s the belief that a space can be transformed, that a room can be made to feel exactly the way you need it to feel, and that vision — careful, considered, emotionally honest vision — is worth pursuing before a single dollar is spent or a single nail is driven. For anyone creating content about home and design, rendering isn’t just a tool. It’s a philosophy: that how a space feels matters as much as how it looks, and that giving people the ability to see their own possibilities is one of the most generous things you can offer.
So tell me — if you could render one room in your life exactly as you’ve always dreamed it, which room would it be, and what would it feel like to finally walk into it?